


One of the many challenges of parenthood include the countless nighttime wakings, navigating through the room in search for bottles, diapers, wipes or clean clothes. Now here's where a well-planned nighttime diaper changing setup makes things a whole lot easier. After changing your baby, having a nearby diaper trash pail provides a convenient disposal point before you settle your little one back to sleep. The ultimate goal here isn't really to have the perfect nursery station, but one that's most efficient for you. For a refresher on the basics, see our step-by-step guide on how to change a diaper.
It could be a nursery, a shared bedroom, or beside your bed; this guide would provide you with a design setup that works well with your room layout while keeping essential supplies close and loose items safely outside the space your baby sleeps.

Key Takeaways
- Ensure to keep only the necessary supplies for a nighttime diaper change within arms reach, and store the bulky supplies away from the baby's sleeping area.
- Plan out a simple path from the crib to your changing surface, then to the diaper disposal area before settling your baby down to bed.
- Use a stable changing surface with soft focused lighting that helps you see clearly without brightening the entire room.
- Have your supplies at arms length and in order of use, this reduces too much movement when changing diapers during nighttime.
- Refresh your nighttime station each morning so it's fully stocked and ready before bedtime
Plan the Night Route Before Choosing Furniture
It helps to vision out each step you're taking after the baby wakes up:
- Pick up your baby.
- Move to a safe changing surface.
- Reach for a clean diaper and wipes.
- Dispose of the used diaper.
- Return your baby to the crib.
- Reset the station.
If some of these steps require you to move across the room and open multiple drawers, you can consider adjusting the room setup.
Instead of assuming the nursery is always the best place for diaper changes, evaluate your actual room layout. For some families, a dresser beside the crib offers the shortest route. Others may find a changing pad in the primary bedroom more practical during the newborn stage.
Count Reaches Instead of Steps
Focus more on how many times you need to stretch, bend, or look for something in the room rather than counting how many steps you need to take to reach a specific area.
These questions are gonna be helpful for you:
- Are diapers within reach or do you have to turn to get them?
- Can you pull and reach wipes with just one hand?
- Can you safely place the used diaper somewhere after securing your baby?
- Is your pathway free from baskets, charging cords, or storage bins?
You’ll thank yourself later for having a clutter-free route through the room especially at night when the visibility could be lower.

Remember That Your Needs Will Change
Your ideal setup today may not be the best solution several months from now.
For example:
- Parents recovering after childbirth may prefer a higher changing surface that minimizes bending.
- Families sharing a bedroom may prioritize shorter walking distances.
- Once babies become more mobile, your arrangement may need to change again to maintain safety.
Think of your nighttime setup as something flexible rather than permanent.
Choose the Best Location for Your Room
Having a perfect space to change diapers overnight is pretty impossible to achieve, but the best one would depend highly on your available space, comfort, and the overall workflow of diaper changes overnight.
Beside the Crib
This option keeps movement minimal and works well in shared bedrooms.
Benefits include:
- Quick access after picking up your baby
- Fewer nighttime steps
- Easier transition back to sleep
It’s advisable not to overcrowd their sleeping area of storage bins or extra supplies. Always keep the crib completely free of loose items.
Dresser With a Changing Pad
Many families use a dresser as their primary nighttime changing station.
Advantages include:
- Comfortable working height
- Nearby drawer storage
- Easy organization
- Stable surface when used according to manufacturer instructions
Always keep a hand on your baby when changing them on an elevated surface and follow with the manufacturer’s safety guidance at all times.
Bathroom Counter
Some parents prefer the bathroom because cleanup is easier.
This location may work well when:
- Lighting is adjustable
- Running water is nearby
- The counter is large enough for a secure changing pad
However, if reaching the bathroom means walking through multiple rooms, it may interrupt everyone's sleep more than necessary.
Nearby Nursery
A dedicated nursery can still be the best option if it provides:
- Better lighting
- More comfortable posture
- Easier cleanup
- Less clutter
While it may involve additional walking, improved visibility and organization sometimes outweigh a few extra steps.
Use a Three-Zone Nighttime Setup
Organizing your space into three simple zones ensures the area is kept tidy but provides enough space for the essentials of diaper changes at nighttime.
| Zone | What Belongs Here | Placement Rule |
|---|---|---|
| At Hand | 1–2 diapers, wipes, barrier cream (if used), absorbent cloth, spare pajamas | Reachable without stepping away from the changing surface. Never place these items inside the crib or bassinet. |
| One Step Away | Lidded trash can or diaper pail, hamper or wet bag, hand-cleaning supplies | Accessible after your baby is safely secured. Keep the walkway clear. |
| Refill Zone | Bulk diapers, unopened wipes, extra clothing, cleaning products | Store in closed cabinets, drawers, or closets away from the baby's sleep space. |
Zone 1: At Hand
This area should contain only the items you'll likely use during a single diaper change.
A small basket or shallow drawer works well for:
- Two clean diapers
- Wipes that are travel-size
- A small tube of diaper cream (if part of your routine)
- Soft cleanup cloth
- One spare sleeper
Avoid overfilling this area with extra products you'll rarely use overnight.
Zone 2: One Step Away
After your baby is dressed and safely settled, you'll need somewhere to place used diapers and soiled clothing.
Keeping a disposal option nearby prevents carrying dirty diapers across the room.
A hamper or wet bag can also simplify cleanup for clothing accidents without cluttering your changing surface.
Zone 3: Refill Zone
Reserve larger storage for daytime restocking.
Store:
- Full diaper boxes
- Extra wipe packs
- Additional pajamas
- Cleaning supplies
- Backup creams
By separating daily storage from overnight essentials, you'll keep the immediate changing area neat and easier to navigate in low light.
Pick Dim, Task-Focused Light
One important aspect in any nighttime diaper changing setup is the room lighting. Keeping the room completely dark isn’t the goal here, what you need is just enough visibility to fasten the diaper properly, check for mess, and clean your baby well and safely, since overly bright lights can make it harder not only for the baby to settle back to sleep.
Leaning more into a small, task-focused light that lights up only a certain area is much better than having to open up the ceiling lights.
Some practical options include:
- A dimmable bedside lamp
- A portable rechargeable light
- A warm-toned night light
- A motion-activated light with adjustable brightness
There are certain kinds of lights that are much preferred by parents such as warm or amber lighting as these kinds feel less harsh than the usual bright white light. Although there are parents who lean more into red-toned lights, there’s really no single light color that could guarantee a better sleep. But what’s really important here is using the lowest practical brightness but one that lets you see clearly.
Position the Light Carefully
Other than the type of light you choose, one more important factor in lighting is its placement.
Aim the light toward the changing surface instead of directly toward:
- Your baby's face
- Your sleeping partner
- The crib
Unnecessary lighting can be reduced when you’re utilizing a more focused lighting on your changing area.
Tidy up your power cords if you’re using one for your lighting, make sure to keep them secured and if possible, away from the crib and your walking area.
Keep Essential Supplies in the Order You Use Them
Simplifying nighttime diaper changes can be as simple as keeping your supplies organized according to your routine instead of having those similar items altogether.
One way to help you do this is to think about the order you’ll reach out for each item naturally.
A simple arrangement might look like this:
- Fresh diaper
- Wipes
- Barrier cream (if part of your baby's routine)
- Soft cleanup cloth
- Spare pajamas
This sequence reduces unnecessary searching, especially when you're tired or holding your baby with one hand.
Use Small Storage Instead of Large Organizers
Avoid turning your nighttime station into a complete diaper caddy.
Instead, use:
- A shallow drawer
- A small storage bin
- A divided organizer
- A bedside basket
It’s ideal to keep only a small working supply nearby, this prevents unnecessary clutter and makes it easier to find what you need quickly, especially during the night.
Bulk supplies should remain in your refill zone and be replenished each morning.
Keep Products Clearly Identified
Have a small tube of diaper cream tightly closed, if you’re using one overnight.
Make sure to keep your products in an upright position with clearl and distinct labels. This decreases the chance of grabbing the wrong item during sleepy nighttime changes.
Always follow the manufacturer's directions for any skincare products and avoid applying treatments unless they're already part of your baby's care routine.
Add One Cleanup Layer and One Clothing Backup
Unexpected messes could still happen occasionally even with smooth diaper changes.
Preparing for those kinds of moments can feel hard, but it doesn’t really need an elaborate setup at all. It could be as simple as having an extra protective layer and one clothing backup nearby.
Protect Your Changing Surface
Depending on where you change your baby, consider using:
- A washable changing pad cover
- A wipe-clean changing mat
- A reusable waterproof liner
Choose whichever option works best for your changing surface and can be cleaned easily afterward.
Keep One Cleanup Cloth Nearby
You wouldn’t realize how a single absorbent cloth or burp cloth can change up your game dealing with small messes especially during nighttime changes.
Instead of going through multiple drawers, keep one folded cloth within easy reach and replace it during your daily reset if needed.
Prepare One Complete Outfit
Accidents sometimes mean changing more than just the diaper.
Rather than collecting separate clothing items in the middle of the night, keep one complete spare outfit together.
Your backup might include:
- Sleeper or pajamas
- Bodysuit
- Socks, if typically worn
After changing your baby’s diaper make sure to place the soiled clothes into a hamper or a wet bag and not just leave it in your changing space.
Put Used-Diaper Disposal at the End of the Route
Many parents focus on where diapers begin but forget about where used diapers end.
A well-designed nighttime diaper changing setup should include a nearby disposal point that fits naturally into your routine.
The ideal sequence looks like this:
- Change your baby.
- Secure clean clothing.
- Return your baby safely to the crib if needed.
- Dispose of the used diaper.
- Wash or clean your hands.
- Reset the station.
This reduces the need to carry used diapers across the room while holding your baby.
Keep Disposal Nearby, But Not Beside the Sleep Space
Keep a designated area where you dispose of soiled diapers, from lidded trash can or a diaper pail. Have it close enough but avoid placing it on your walking path.
If your space allows avoiding placing the bin beside the crib, best to keep it a step away from your changing surface.
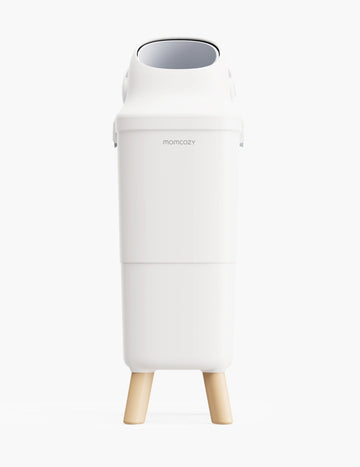
For families looking for a dedicated disposal option, the Momcozy Triple-Seal Diaper Pail is designed with features that support everyday convenience, including:
- Rotating lid that keeps the smell in when dropping new diapers and while in stand by
- Extra-wide 5.71 × 5.12-inch opening that accommodates bulky toddler diapers
- Patented clamp bag seal that keeps the smell in when taking out the bag
- Compatibility with standard 13-gallon trash bags
- 22-liter capacity, able to contain up to 60 newborn diapers or 24 large diapers
- Child safety lock that prevents toddlers from opening the diaper pail
- Transparent fill window that lets you view the inside to know if the diaper pail is full
- Easy-to-clean design
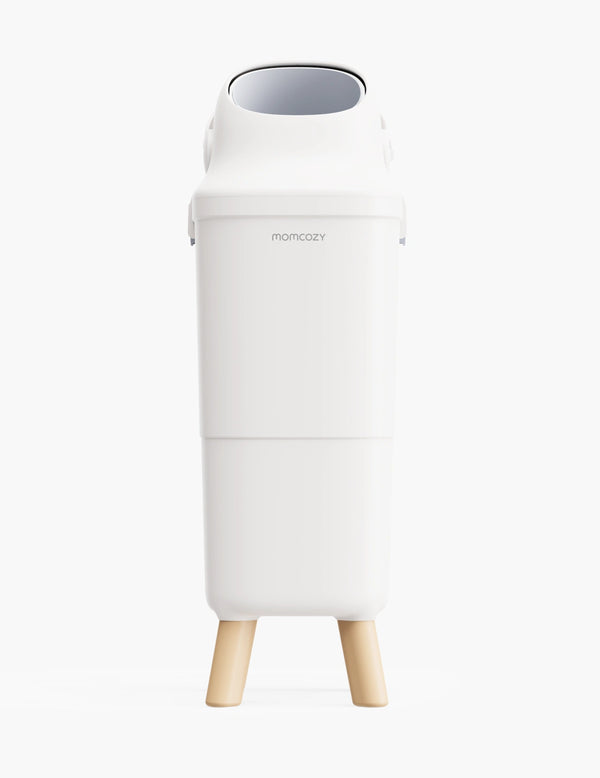
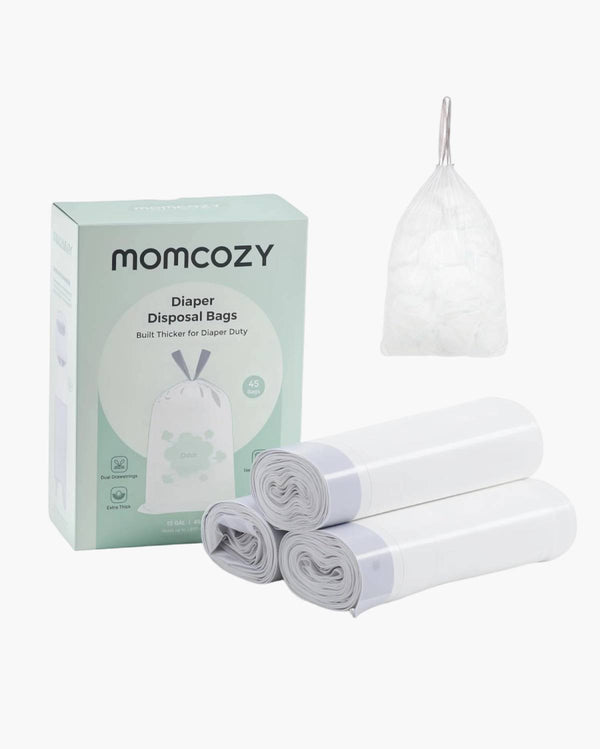
These features are designed to help contain odors while simplifying diaper disposal during busy caregiving routines.
If you'd like to learn more about whether this type of product fits your household, check out Momcozy's guide on Do you need a diaper pail?

Coordinate the Setup With Night Feeding, Without Creating a Schedule
Even though diaper changes can happen closely with nighttime feedings, it’s not safe to assume the same will happen everytime. Keep your room layout flexible enough to accommodate any change in plans or routine. If nighttime feeding is part of your routine, our guide to breastfeeding at night offers tips for a smoother routine.
Some routines could start with feedings then a diaper change, while for others it could be the other way around. Your pediatrician or healthcare provider can offer guidance depending on your child’s individual and changing needs.
Rather than focusing on timing, organize your room so feeding and changing each have their own dedicated spaces.
You can start with:
- Baby bottles, nursing supplies and pumping items are ideally kept separate from the diaper-changing items.
- Have your water bottle or snacks outside the diaper-changing area.
- Your diaper disposal should be far from where you keep clean burp cloths.
- Avoid mixing clean feeding supplies with used clothing or wipes.
Keeping these zones separate makes your nighttime routine feel more organized while helping reduce unnecessary cleanup later.
Reset Your Station in Under Two Minutes Each Morning
A simple morning reset helps ensure your nighttime diaper changing setup is ready before bedtime arrives again. Not to worry as it would only take a moment of your time.
A quick run through this quick checklist:
- Replace the diapers used overnight.
- Refill wipes if running low.
- Return one spare outfit to the station.
- Replace your cleanup cloth if needed.
- Close creams securely.
- Empty unnecessary packaging.
- Clear the walking path.
- Restock from your refill zone.
Empty your diaper pail and maintain it according to your household routine and following through the manufacturer’s recommendation of use and maintenance.
Completing this quick reset each morning helps prevent late-night surprises, like discovering you've run out of wipes halfway through a diaper change.
Adapt Your Setup for Small Bedrooms, Shared Rooms, and Recovery
Every family's home looks different, and your nighttime diaper changing setup should reflect your available space and not someone else's nursery.
Small Bedrooms
You don’t have to give up convenience when dealing with limited space. Instead of adding rolling carts or oversized storage, focus on keeping only the essentials nearby.
Look for:
- Vertical storage
- Small bedside organizers
- Closed drawers
- Wall-mounted shelving outside the baby's sleep area
Avoid narrowing your walking path with bulky furniture.
You can also use the Momcozy Playart, which serves three functions. It can switch between playard mode and bassinet mode with a single touch. On top of that, it pairs with the Momcozy Changing table to create a complete changing station.
Shared Bedrooms
If your baby sleeps in your room, a compact setup helps reduce disruption for everyone.
Choose:
- Quiet-opening storage bins
- Soft, directional lighting
- Minimal supplies at arm's reach
- Clearly defined changing and sleeping areas
Although there’s no guaranteed setup that will let your partner sleep through the diaper changes, a thoughtful organization can go a long way to keep the interruptions minimal.
During Postpartum Recovery
Parents recovering after birth may benefit from reducing bending, twisting, and unnecessary walking.
Consider:
- A changing surface at a comfortable height
- Frequently used supplies within easy reach
- A shorter walking route between the crib and changing area
Your baby will grow and become more mobile, so it’s important to assess your bedroom setup every now and then, to make sure it still fits your needs and safety.
Frequently Asked Questions
What should I keep near the crib for nighttime diaper changes?
Keep only the essentials within easy reach, including one or two diapers, wipes, diaper cream if part of your routine, a cleanup cloth, and one spare pair of pajamas. Store larger refill supplies elsewhere and keep all loose items out of the crib or bassinet.
Where is the safest place to change a diaper at night?
A stable changing surface that follows the manufacturer's instructions is generally the safest choice. Whether it's a dresser with a changing pad or another designated surface, always keep one hand on your baby when using elevated furniture.
What kind of light works best for nighttime diaper changes?
A dim, focused light that illuminates only the changing area works well. The goal is to provide enough visibility for safe diaper changes without unnecessarily brightening the room.
Should a diaper pail be next to the crib?
It's usually more practical to position a diaper pail one step away from the changing surface rather than immediately beside the crib. This keeps disposal convenient while maintaining a clear sleep area.
How can I create a nighttime diaper changing setup in a small bedroom?
Use a compact three-zone approach by keeping only the immediate essentials within reach, placing disposal nearby, and storing refill supplies in drawers or closets. Prioritize a clear walking path over adding extra organizers.
What should stay outside the crib or bassinet?
Loose diapers, wipes, creams, blankets, storage bins, cords, clothing, and other supplies should always remain outside the baby's sleep space. Keeping the crib or bassinet free of loose items helps support a safer sleep environment. For safe sleepwear options, see our guide on whether sleep sacks are safe for babies.
Conclusion
You can achieve a smooth nighttime diaper changing setup, without having to add unnecessary equipment or clutter. By means of focusing on a simple route instead of a complete and perfect changing station. From moving your baby from the crib to the safe changing surface, keeping supplies in order of use, using a soft task lighting, a back up change of clothes at arms reach, and a nearby disposal option at the end of it all.
Keep in mind that the best setup can look different and work differently from one mom to another. Find one that resonates with you, one that works well with how you do things. At some point your family’s needs will change and as the baby grows you can adapt and adjust your organization keeping the nighttime care safe and efficient. Understanding your baby's overall sleep rhythm can also help. See our guide to managing your newborn's sleep schedule.
If you're looking for a convenient disposal solution to complete your nighttime routine, the Momcozy Triple-Seal Diaper Pail can serve as a practical endpoint in your diaper-changing workflow, helping keep used diapers contained while fitting naturally into your overnight setup.








