


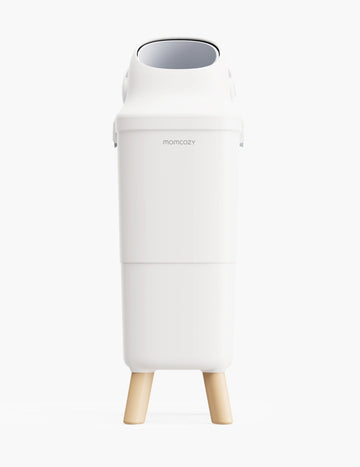
Having a small nursery, shared bedroom or apartment to create a functional baby changing station is not a problem. The goal is to maximize convenience, while keeping the area safe, clean and organized. Instead of cramming your space with big furniture, choose a setup that works with your available space and keeps your diaper changing essentials within arm’s reach. And, having a diaper pail next to the changing station (not on it) can help keep things a little bit neater.
For example, the Momcozy Triple Seal Diaper Pail is designed with a compact footprint that fits neatly alongside a changing area while helping contain odors.
Please continue reading to learn more.

Key Takeaways
- Measure the space first. Before purchasing any furniture and storage equipment, determine the available floor space, the distance between pieces of furniture, the space for a caregiver to stand, and the walking/crawling trail for the child.
- Buy the furniture with multiple uses in mind. Instead of a changing table, buy a dresser with an approved surface for changing that will continue to serve its purpose after the diapering period.
- Keep only the most necessary items within reach. The diaper, wipes, diaper cream, and an extra set of clothes should be within one’s reach. The stock of these products should be kept in a closed cabinet, drawer, or closet. For more guidance on creating an efficient diapering routine, see our step-by-step guide on how to change a diaper properly.
- Make a place for rolling storage. Rolling storage equipment can create a hazard if not put away in the assigned place.
- Put the diaper pail within the caregiver’s exit trail. The pail with soiled diapers should be placed at the caregiver’s exit side, away from the supply area, and out of the way of standing or walking space.
Audit the Space Before Choosing a Setup
Measure Your Available Space First
When it comes to furnishing a small space with a changing station, the emphasis must be on the furniture that one already has, rather than what one does not. The first step, therefore, is measuring the wall where the changing station will be located, as well as the depth of any furniture that will be used there. The available space to the side and in front of the furniture, which will be needed to open drawers, cabinets, or a closet door, should also be taken into account. A deeper furniture than expected may hinder the process of everyday use of the changing station.
Leave Enough Room to Move Comfortably
The next step is to choose a spot where you can install the changing station in such a way that there is enough free space to allow you to move around. There should also be a place to lean or sit while tending to the child, and a clear path from the station to the crib, bassinet, or the room’s exit, giving you quick access to the child in case you need to pick them up and take them elsewhere.
If your changing station is located near your sleeping area, proper bassinet placement can also help improve convenience and safety. See our guide on how to arrange a bassinet in your bedroom for more ideas.
Choose a Practical and Safe Location
It is important to choose a place with a surface that is easy to clean or a paint that is easy to refresh, in case of any unexpected incidents, such as a child’s meal getting spoiled on the floor, which can be a real challenge to deal with if it is not the right material.
Sketch Your Layout Before Buying Furniture
Before buying any furniture, it is a good idea to draw up a plan for the space. An image of the space can be printed out or sketched on paper, leaving enough space for furniture, doors, access points to the outside, and a pathway. This will allow for a rough image of what the changing station will look like once all the furniture has been placed and will help identify problems and their solutions before new furniture is purchased.
Pick One of Four Small Space Station Models
The best way to set up a changing station will depend on the space you have, other furniture, and how much storage you need. Whether you want something permanent or more flexible, selecting the right changing station furniture will help you create a functional and non-cluttering diaper changing environment.
Dresser Top Changing Stations
If you have a sturdy dresser, adding a changing surface as a changing station is often the simplest solution. You can find a variety of dressers with an appropriate changing surface for your needs, or install one on the top of your existing furniture that matches the manufacturer’s recommendations.
Wall Mounted Or Fold Down Changing Stations
If you have a limited amount of space, consider getting a wall mounted or fold down changing station. It will save you precious space and give you exactly what you need, a changing station. Make sure to install it according to the manufacturer instructions or call a professional for help if you have any problems.
Rolling Cart Changing Stations
A rolling cart combined with an independent surface designed for changing is another flexible option. You will be able to conveniently transport your changing supplies around the house and have plenty of storage space to accommodate your needs. Make sure that the cart you select is compatible with the changing surface you will use as a station. This will prevent potential injuries in the future.
Portable Changing Basket Or Kit
If you wish to avoid permanent installations, a portable changing basket or kit is the way to go. You can save space inside a cabinet, a closet, or other built-in storage solutions while having a diaper changing surface available for use. Combined with an independent and approved changing surface, such a setup will allow you to keep your home organized and clutter-free.
Compare the Four Layouts Before You Buy
Choosing the right changing station is about more than identifying what's included: assess each layout based on their ability to meet your storage needs while maintaining functionality and accessibility. Often, a simplified formula provides better value: a layout that makes the room easier to navigate is a better choice than one that has more storage capacity.
Dresser Top Changing Station
This type of changing station is often recommended for smaller rooms as it combines two types of storage (dresser and diaper changing) in one space-saving unit. If you already have a dresser, you could maximize your storage by looking for a product that can be attached to the existing unit. This way, you can also have an option to remove the changing station when it's no longer necessary.
Wall Mounted or Fold Down Changing Station
If you're looking for a changing station in a very small room, consider a wall mounted or a fold down changing station. Both these options offer the ability to save space by keeping the changing surface out of view when it's not in use. These options, however, offer fewer storage options than the ones mentioned above and require careful installation.
Rolling Cart Storage
This type of storage is best for keeping the diaper changing equipment organized and within reach. It allows you to transport the inventory from one room to another as needed and offers a flexible storage solution. Rolling carts, however, should not be used as a changing station unless they're specifically designed for this purpose.
Portable Changing Basket or Compact Kit
These kits offer the most space-saving option as they can be tucked away in a variety of enclosed spaces such as cabinets, closets, or shelves. The main advantage of a portable basket is the ability to keep your diaper changing equipment secure, organized, and within reach. This option is best suited for those who have a compact but safe changing surface and wish to store their inventory in a separate, enclosed space.
Choose the Layout Based on the Space You Have
As you're choosing the layout, cross out any options that block the access to other surfaces and appliances in the room, as well as those that make it harder to navigate the room with a baby. Small rooms particularly benefit from a functional layout: in many cases, reducing the number of pieces of furniture makes the room safer and easier to navigate.
Make a Dresser Top Work Without Losing the Dresser
A dresser top changing station is one of those multitasking miracles that make the most of a small nursery or bedroom. It creates a convenient changing area while saving space by replacing one piece of furniture, making it ideal to free up floor space. With some smart organization you can have the convenience of a changing station and still be able to return the dresser to its original state when the need arises.
Start With the Dresser
If you have a nice dresser that's the right size, you could save both time and money by putting a changing product on it instead of incurring the expense of a new changing table itself. This will save valuable space, too, since you've been able to make use of what you already own.
Compatibility Is Critical
Make sure that whatever product you choose to place atop your selected dresser is compatible with it before doing any permanent installations. Always adhere to installation rules and regulations from manufacturers as you attach your chosen unit and make sure not to allow it to overhang unsafely.
Keep Your Supplies Within Easy Reach
Within easy reach but out of sight, you should always have a supply of diapers, wipes, diaper rash cream, and an extra outfit for when you need them right away. One shallow drawer or even a section of a top drawer can be dedicated toward extra storage space for your changing station needs, and you can even make use of drawer dividers to keep the area organized and everything you need close at hand.
Keep the Top Clear Besides the Changing Station
In addition to the changing station itself, clear away all the clutter that you can from your new changing area as well. This will provide extra working space for you while you're getting your baby cleaned up - and it will also help you maintain a clear view of your child at all times.
Think About Long-Term Use
Dresser top changing stations are great investments because they're made to last. You can make use of the dresser again once your child no longer needs a changing station on it, and it should be simple to remove the product itself when the time comes.

Use Vertical Storage Without Creating a Reach Hazard
Vertical storage is a great way to optimize the limited space in a small nursery or bedroom, but it's important to plan accordingly and make sure everything is safely stored at a reachable height to prevent accidents. By using wall mounted storage you can easily free up much needed living space, as long as the most used items can be reached and the storage is not placed overhead as to cause potential safety issues.
Install Safe Wall Mounted Storage
Shelves or other storage should be mounted in a secure manner and used to store only light objects such as packages of diapers that have not yet been opened, folded up burp cloths, extra changing pad covers, or receiving blankets.
Light items that are not necessary to have on hand at all times should be placed overhead in secure storage, and all storage should be mounted securely according to the manufacturer's recommendations.
Avoid Overhead Storage Over The Changing Surface
Baskets, shelves, jars, or other storage that are mounted or placed on the overhead or above the changing surface need to be avoided even if they are mounted or placed securely. All storage should be mounted or placed in a way that avoids having to bend down, lean over, or stretch while holding your baby
Keep Frequently Used Supplies Within Easy Reach
Diapers, wipes, diaper cream, or other supplies that are used frequently should be stored within easy reach at a comfortable height while standing at the changing station. You will want to have everything within easy reach because it will help you avoid leaning or stretching when your baby is needing you the most.
Update Storage As Your Child Grows
As children grow, become more active, and mobile, it is important to make sure that potentially dangerous objects are stored out of their reach in the nursery or baby's room. Medications, creams, nail clippers, cleaning supplies, and other potentially dangerous small objects need to be stored safely and securely
For a complete breakdown of what belongs in your everyday organizer, see our Diaper Caddy Essentials guide, which covers supply organization in greater detail without overcrowding your changing station.
Give a Rolling Cart a Parking Bay
A rolling cart can be a great space-saving storage solution, but it has to have a home. It will help you to have everything organized and within reach while keeping your home clutter-free.
Pick a Convenient Parking Spot
The cart should be parked in an area where it does not obstruct any closet doors, dresser drawers, or your path from the changing station to the crib or into the room. You should have enough space to navigate the room without having to move the cart first.
Lock the Wheels
If your rolling cart has wheels that can be locked or a brake, make sure to engage it and lock the wheels when not in use. It will ensure that the cart does not roll away from the parking spot on its own.
Set Everything in Order
Store frequently used things, such as diapers and wipes, on the top shelf or somewhere within easy reach. Place backups and less used items on the lower shelves, and keep the cart's space free from unused large packs or rolls of anything.
Test Your Parking Spot Before Getting Used to It
Before you start using the rolling cart as a regular storage solution, make sure to move it a couple of times from the parking spot to the changing station and back to check that it does not obstruct your traffic in any way.
Remember That a Rolling Cart Is Meant to Store, Not to Change
A rolling cart is only a storage unit for your diaper-changing needs. It is crucial to keep your baby on a reliable and safe changing station or a changing table unless it is a special-purpose rolling cart.
Build a Portable Secondary Kit, Not a Second Full Station
A portable changing kit can be a fantastic way to create an alternative changing station in various parts of the house without taking up extra space as a second station. Keeping your kits limited to the bare minimum needed for a couple of diaper changes and making sure your backup stock is stored in one main place will make things less cluttered and much easier to stock up on.
Keep Your Main Stock In One Place
Rather than storing your primary supply of baby products around the house, keep your main stock stored in one place. Use a closet or cabinet as a secondary stockroom for spares and backups. Keep the extra changing kit in your entertainment center, so you can toss it in without having to dig through every room.
Keep the Necessary Things Only
Only the essential goods should be kept in your portable changing kit. Keep extra diapers, wipes, cream, and a change of clothes. A little goes a long way, and your kit should only be as big as necessary.
Keep a Designated Secondary Changing Station
If you are using a portable kit as a secondary changing station, keep a separate changing pad in a different room than your primary one. It is better to have a station to sit on while doing the dirty work than the floor or the counter. Having a separate station is also a good way to keep your baby’s environment clean.
Keep Your Stock Easy to Restock
Having a single stockroom means you will be able to keep track of what you need to buy or replace more easily. That way, there is no risk of buying too much or too little, and less clutter as everything is in one place rather than multiple locations.
Keep It Easy to Carry Around
Keep your kit in a basket or small bag that you can carry from room to room without effort. Having a portable station means you can get creative with the places you change your baby in, but it has to be practical too. Keeping your kit organized and easy to carry means you can keep changing your baby wherever you go without leaving a trail of mess behind.

Separate Working Supplies From Bulk Refills
A well organized changing station is not about having more things within reach. It is about having only the things that you need within reach while keeping everything else out of the way. Keeping your changing station and your supply stash organized by dividing them into separate storage areas is going to make your job so much easier.
Working Layer
The working layer is where all the materials for one diaper change should be placed. This can be a shallow drawer or a couple of small bins or even a small organizer right next to the changing area. Keeping these supplies organized also makes it easier to monitor your baby's diaper habits and notice changes over time. For more tips, check our guide on tracking baby pee and poop patterns.
What to put there?
- Diapers
- Wipes
- Diaper cream
- An extra outfit
- A burp cloth or small towel
Having only these things within reach will help you avoid getting distracted by your surroundings while taking care of your little one.
Refill Layer
Bulk supplies should be placed elsewhere. Stock the closet, wardrobe, cabinet, or bottom drawer of the dresser with unopened packs of diapers, extra wipes, additional clothes, more changing pad covers, and extra toiletries.
Doing this allows you to keep track of what you need to restock while minimizing clutter in your working drawer.
Dirty Layer
The final section of storage is for items that have already been used. Keep a laundry basket or wet bag nearby for dirty laundry, and have a specific place for getting rid of used diapers. I keep my used-diaper storage on the caregiver side of the station so that I can get rid of them easily once my baby is safe and secure without digging through clean supplies
Adding simple drawer labels or storage labels to your unit also helps keep counters clear by giving everything a home. Once everything has a home, cleaning up is just another part of the process and not an overwhelming task.
Place the Diaper Pail Without Sacrificing Floor Space
Even in a small room, your diaper pail should be placed where it is easily accessible without impeding your work area. Understanding how a diaper pail works and why it is useful can help you choose the right option for your nursery setup. Learn more in our guide on what a diaper pail is and how it helps manage diaper waste. You want to make a smooth, efficient diapering process for yourself and leave room for the rest of your furniture.
The best place to position your pail is at your exit side leg. It should be close enough that it is convenient to your body after you have secured the infant but not so close that you have to bend over or walk across the floor to reach it.
Do not place the pail directly under any overhead cabinets or shelf space where objects might slip or fall into its opening. In addition, avoid placing it near a heat source like a radiator or heater. Finally, make sure the pail is out of the reach of your toddler and other young children who may try to open it unsupervised.
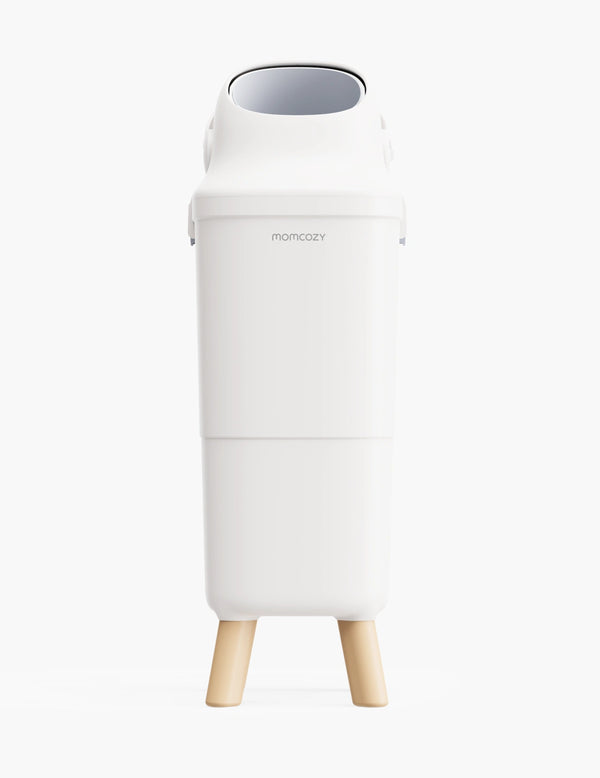
If you are looking for something a little more compact for your home, the Momcozy Triple Seal™ Diaper Pail has some features that are perfect for smaller homes and families including:
- Compact 22 L capacity suitable for smaller spaces
- Hands free wide opening for convenient disposal
- Patented clamp bag seal that helps contain odors during use
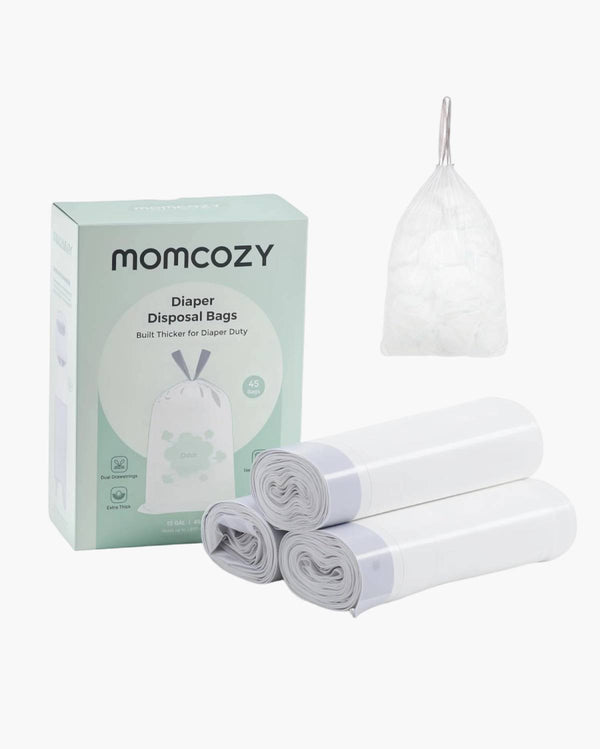
- Compatible with standard 13 gallon trash bags
- Built in child safety lock
- Transparent window for checking bag fill level
- Easy to clean interior and exterior surfaces
Unfortunately, not much can be done to get rid of all diaper smells completely, but with the right pail and placement, you can cut down on odor and keep your changing station organized at the same time.
Run a Five Minute Clearance and Safety Test
Before you consider your job complete, test it out for a few minutes. A quick walk-through can help identify things that might not be immediately apparent.
Test the primary walkways by walking through your space a few times while pushing or pulling a weighted object similar in weight to your little one. Make sure all doors, drawers, and cabinets are open and free of obstruction. It can be tempting to ignore these little details, but they will quickly become apparent in the middle of a busy night.
Walk around your changing station in your regular diaper-changing position, facing the storage area. This will allow you access to the most common storage areas without straining. Make sure nothing requires you to twist around or ask for help.
Complete a quick safety check by confirming:
- Furniture is properly anchored when required.
- The changing product is compatible with the furniture it is installed on.
- Rolling cart brakes engage securely.
- Wall shelves and hooks remain firmly attached.
- Loose items cannot fall onto the changing surface or into the baby's sleeping area.
- Walkways remain clear of baskets, cords, and storage containers.
As your baby learns to crawl, walk, and explore his surroundings, it is important that you go through this same safety review. As your home arrangement changes, you may need to make adjustments to ensure that the baby changing station remains practical and safe.

FAQs
Can I use a dresser as a changing station in a small room?
Yes. A durable dresser that provides an area for changing along with appropriate infant or toddler changing products will be best in case of space issue because it can be used for two purposes and will allow maximizing the space. This furniture will also provide a place for child after another stage of development when they will not need a changing table anymore. It is essential to make sure that the dressers and changing products are compatible with each other to ensure safety and proper usage.
Is a rolling cart enough for a baby changing station?
No. A rolling cart can hold diapers and wipes, but it should not be used to replace an approved changing surface unless it is designed specifically for use as a changing station by the manufacturer. A cart can be used for storing items in an organized manner that may need to be accessed at multiple locations within the room. To reduce the risk of injury to the infant and caregiver, always place the cart in a designated location and use an approved changing surface that has been recommended by the manufacturer for preparing the infant for a diapering procedure.
How much floor space does a small changing station need?
There is no universal measurement, because it depends on the room where the furniture is going to be placed. It is better to measure the area to be able to leave enough space to move around and reach for objects within the room. It is important to leave enough space to let the child move freely and without blocking the central passage. The ideal number of square feet will eliminate the clutter, while providing comfort and safety in diaper changing.
Where should a diaper pail go in a small nursery?
Place the diaper pail at the caregivers' exit side of the changing station so that it is within easy reach once your baby is secured. You should place the pail out of the way so that it is not an obstruction to your primary area in your workspace. Avoid placing it beneath shelves, near heat sources, or in other locations that are unsafe or make it hard to access. By putting the pail in the right place, you make diaper changes faster and easier while also keeping your clean supplies separated from your dirty ones.
How can I add storage without putting shelves above the baby?
Use available wall space on the wall near the changer area to install shelves, hooks, or pockets in which to safely store smaller items so they are out of the way of the changing area. Store larger supply items overhead and those used most often within easy reach (below shoulder level). Do not place heavy items or ones with small parts above the baby's reach where the child might pull them down. As your child becomes more independent and mobile, place small objects, lotions, and cleaning supplies in child-resistant containers.
Do I need a changing station in every room?
No. Most people I know have one good changing station well-stocked with necessary items. If you need a place to change a baby that's not the main one, a small portable changing bag or something will have enough to do the task until you get back to your main station. It's much more convenient and avoids clutter and extra stockpiling.
Conclusion
To make a baby changing station in a small room, you should first put away your desires to purchase an extended set of shelves and choose wisely the best option for your room. To do this, it is necessary to measure the available free space, select a station that will best suit your home, separate all items in the station by working, replenishment, and dirty areas, equip a parking place for rolling trolleys, and study the clearances with a quick and easy check.
These five steps should allow you to create the ultimate setup for changing your baby that will help you navigate everyday tasks without cluttering your room with unnecessary items. It should also be remembered that in the case of a small room, multi-functional furniture, and properly arranged storage and traffic areas, is often more useful than the additional organizers and equipment.
In addition to the above tips, it may be worth considering a compact diaper disposal such as a Momcozy Triple Seal™ Diaper Pail. It can be placed near the caregiver’s side, which will provide free access to trash without disrupting the flow of the changing station. The space-saving design and odor-proof seal will allow creating an ultimate setup for everyday use and maintaining a tidy appearance in the room.








