


MEDICALLY REVIEWED BY

Zola Zhang, MD, IBCLC, Breast Surgeon, Mother
Breast Surgeon | International Board Certified Lactation Consultant | Mother
As a dedicated Breast Surgeon and International Board Certified Lactation Consultant (IBCLC) with 21 years of clinical experience, my work is rooted in both medical expertise and the lived reality of motherhood—because I’m not just a clinician, but also a mother who exclusively breastfed my own child for two years. This dual perspective shapes every interaction, allowing me to blend scientific rigor with deep empathy for the joys and challenges of breastfeeding.
Yes, a 14-hour international journey with pumped milk can be workable—but only if you treat the cooler as part of a route-specific cold-chain plan. Freshly expressed milk can travel in an insulated cooler with frozen ice packs for up to 24 hours, not because any particular bag promises a certain number of hours.
For an overseas itinerary, there are really four separate questions:
- Can you take the milk and cooling supplies through departure security?
- Will you be screened again during the layover?
- Can you bring the milk through customs at your destination?
- Can your cooler, pump, and power supplies fit within the operating airline’s rules?
Build your plan around all four—not just the first airport.
Map the Route Before You Choose How Much Milk to Carry
Before deciding how many bottles or storage bags to bring, list every airport and border point where the milk could be inspected.
A connection may involve another security checkpoint before your next flight or the trip home. Whether that happens depends on the airport, routing, immigration process, and whether you need to enter the transit country. Customs is a separate process from security: destination authorities may inspect, limit, or seize items under their own entry rules.
Check these points shortly before departure:
- Departure-country security authority: Rules for expressed milk, cooling packs, pumps, and spare batteries.
- Transit airport or transit-country authority: Whether you will re-clear security, pass immigration, collect baggage, or enter the country during a long layover.
- Destination customs or biosecurity authority: Rules for milk and dairy-related products entering the country.
- Operating airline: Carry-on dimensions and weight, whether a pump or cooler counts as an additional personal item, and battery or onboard-power policies.
If a customs declaration asks about food, dairy, liquids, or biological products, declare the breast milk. The exact wording and requirements vary by destination, but treating customs questions as optional can create a much bigger problem than a brief inspection.
Do not assume a U.S. security allowance follows you overseas. Other checkpoints may apply different rules to refrigerated milk, frozen milk, cooling materials, quantity limits, or whether the baby is traveling with you.
Build a Cooler Setup You Can Check, Not Just Trust
The practical goal is simple: keep the milk cold with frozen cooling media, make the contents easy to inspect, and know what condition the milk is actually in during a delay.
Pack the cooler around your real milk volume rather than filling a large bag with extra empty space. Your setup should include:
- An insulated cooler bag that fits your intended containers and cooling packs
- Frozen ice packs positioned around, not merely underneath, the milk
- Clearly labeled bottles or bags
- A temperature-monitoring method you have tested at home
- A clean outer pouch or compartment for pump parts and supplies
- A delay buffer: enough cooling capacity for the itinerary plus the disruption you are most likely to face
There is no universal answer to “How many ice packs do I need?” Cooler performance depends on the bag, amount of milk, container shape, pack size, how often the bag is opened, and the surrounding temperature. A bag’s marketing time claim cannot tell you what will happen after a delayed gate departure, long immigration line, or missed connection.
Instead, run a realistic pre-trip test. Pack the same cooler with the same bottles, frozen packs, and approximate milk volume you expect to carry. Keep it closed for the planned travel period plus extra time, checking your monitor without repeatedly opening the bag. This gives you a personal planning baseline and reveals whether the setup is too large, too warm, or too difficult to organize.
At U.S. checkpoints, ice packs, freezer packs, frozen gel packs, and similar accessories needed to cool breast milk are allowed in carry-on baggage. Partly frozen or slushy packs may receive additional screening, so leave extra time rather than assuming they will pass quickly.
For easier U.S. screening, clear or translucent bottles may be more straightforward than opaque bags or pouches. That is a convenience consideration, not a reason you must avoid milk storage bags.
Know What Applies at a U.S. Checkpoint
If your departure checkpoint is in the United States, breast milk may be carried in hand luggage in quantities greater than 3.4 oz (100 mL). It does not need to fit into a quart-sized liquids bag, and your baby does not need to be present or traveling with you.
At the start of screening:
- Tell the officer that you are carrying breast milk and cooling accessories.
- Separate those items from other restricted liquids in your carry-on.
- Allow time for additional inspection if requested.
- Keep the cooler organized so you can repack it promptly afterward.
U.S. officers may screen the milk and related items. You may request that milk not be X-rayed or opened, but that request can mean additional screening and more time. These are U.S.-specific procedures, not an international guarantee.
For your overseas connection, have a short explanation ready: “This is expressed breast milk for my child, packed with cooling supplies.” Keep any relevant route information and contact details accessible, but do not rely on a note or label to override local rules.
Plan the Layover Around Pumping, Cleaning, and Cooling
A long layover is easier when pumping is part of the schedule, not an emergency squeezed between boarding calls. When possible, express milk during breaks about as often as your baby would normally feed. Individual schedules and medical circumstances differ, so follow your established plan or clinician’s guidance where needed.
Before you travel, locate lactation facilities at the departure airport, transit airport, and destination. U.S. airports are required to provide a private, non-bathroom space for expressing milk in each terminal, but you should not assume the same facilities, sinks, privacy, or power access overseas.
Make a Clean-Parts Plan
Bring a plan that works even if the airport setup is limited:
- Clean pump parts before leaving home.
- Pack only the supplies you can realistically keep organized and clean.
- Wash hands with soap and water before expressing milk when available.
- If soap and water are unavailable, use hand sanitizer containing at least 60% alcohol.
- Keep newly expressed milk clearly separate from older milk until you can pack it appropriately.
- Record when newly expressed milk was collected.
The important decision during a difficult layover is not always “save every drop at any cost.” If you cannot keep milk stored according to your plan, you may need to pump and discard rather than create uncertainty about its handling. Depending on your circumstances, pumping during travel may also involve storing the milk, sending it home, or discarding it when storage is not possible.
If your pump uses mains electricity, confirm whether you need an adapter or converter for the countries on your route. A manual or battery-powered backup can be useful, but confirm the airline’s battery policy before packing it and do not assume aircraft outlets will be available.
Use a Milk-State Decision Tree After Delays and Arrival
When you arrive—or when a delay makes you question the cooler—separate the milk by its condition. Freshly expressed milk, frozen milk with ice crystals, and previously frozen milk that has fully thawed do not follow the same next step.
Freshly Expressed Milk Carried Cold
If freshly expressed milk has been transported in an insulated cooler with frozen ice packs, use it immediately, refrigerate it, or freeze it once you arrive.
If your monitoring plan or the cooler’s condition leaves you unsure how the milk was held, do not treat a cooler that merely feels cold as proof of its temperature history. Use your recorded times and monitoring information, and seek individualized clinical guidance if you cannot make a confident handling decision.
Frozen Milk That Still Has Ice Crystals
Check frozen milk periodically during a long trip and again at arrival. If frozen milk still contains ice crystals, it may be refrozen.
This is why a quick visual check matters: ice crystals are meaningful evidence of the milk’s state, while the appearance of a partly melted ice pack alone is not.
Previously Frozen Milk That Has Fully Thawed
If previously frozen milk has thawed completely, it should be used within 24 hours after complete thawing. That 24-hour window is specific to milk that was previously frozen; do not apply it automatically to freshly expressed refrigerated milk.
If you are handing milk off at a hotel, family home, or final destination, make the decision immediately. Put it into the refrigerator or freezer as appropriate rather than leaving it in the travel cooler while you unpack.
Before You Leave: A 14-Hour Travel Checklist
- Verify security rules for your departure airport, transit point, and destination.
- Confirm destination customs or biosecurity requirements and declaration questions.
- Check the operating airline’s carry-on, cooler, pump, and battery policies.
- Test your exact cooler setup with your intended bottle count, frozen packs, and a temperature-monitoring method.
- Pack enough cold-chain capacity for delays, not only the scheduled journey.
- Organize milk so it can be separated and repacked quickly at screening.
- Identify layover lactation facilities and make a clean-parts plan.
- Save official airport, airline, customs, and security contacts or policy pages before travel.
- Decide in advance what you will do if newly pumped milk cannot be stored confidently: save, send home, or discard.
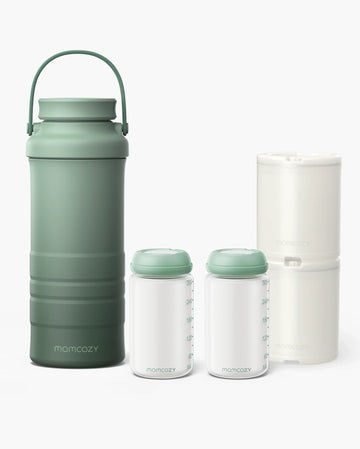
Once your route and cold-chain plan are set, choose gear to match it—not the other way around. If you still need a bag, pump, or storage solution that fits your tested setup, explore verified Momcozy storage and pumping options with those practical criteria in mind.








