MEDICALLY REVIEWED BY

Zola Zhang, MD, IBCLC, Breast Surgeon, Mother
Breast Surgeon | International Board Certified Lactation Consultant | Mother
As a dedicated Breast Surgeon and International Board Certified Lactation Consultant (IBCLC) with 21 years of clinical experience, my work is rooted in both medical expertise and the lived reality of motherhood—because I’m not just a clinician, but also a mother who exclusively breastfed my own child for two years. This dual perspective shapes every interaction, allowing me to blend scientific rigor with deep empathy for the joys and challenges of breastfeeding.
For most caregivers holding a newborn, a foot-pedal pail can be a straightforward choice—if the exact model opens mechanically, stays stable on your floor, and lets you finish the full disposal sequence without needing your free hand. A sensor pail can be appealing for touch-free access, but it is worth choosing only after you have confirmed how that specific model detects motion, closes, handles power loss, and opens manually if needed.
The deciding factor is not the label on the lid. It is whether you can approach the pail, open it, drop in the diaper, deal with any inner flap, confirm that it is closed, and walk away while one arm is still occupied.
Test the Entire One-Handed Disposal Sequence
A diaper pail can look hands-free in a product listing yet create an awkward extra step during a real newborn change. The useful test is not simply, “Can I open it?” Ask whether you can complete this sequence comfortably: 
- Reach the pail without shifting your hold on the baby.
- Open it while holding the diaper, wipes, or a changing-pad cover.
- Get the diaper through the opening without needing a second hand.
- Make sure the odor barrier is restored.
- Recover easily if a diaper misses the opening or a wipe catches on the edge.
Hands-on testing of the Diaper Dekor Plus found that its foot lever could be operated hands-free while the caregiver held a baby and deposited a diaper. That is encouraging evidence for that particular pedal design—not proof that every pedal pail will feel equally easy.
A pedal can also be more practical than a small top-mounted button when one hand is holding a baby and the other holds a dirty diaper. But foot operation is still body- and room-dependent. Before buying, consider whether you can comfortably press the pedal while barefoot, in socks, wearing slippers, or standing after a long night feed.
Do Not Ignore the Inner Barrier
A pedal opening does not always mean a one-step drop. On the Diaper Dekor Plus, pressing the foot lever opens the top but reveals a square flap over the disposal opening. The diaper still has to pass through that flap.
That may be perfectly manageable if you can guide the diaper down with your free hand. It may be less appealing if you often have a bulky diaper, wipes, and clothing in that hand—or if bending, balancing, or pushing downward feels uncomfortable during postpartum recovery.
When possible, try a display model with something roughly diaper-sized. Press the pedal, simulate a deposit, and see whether you can complete the motion without leaning over the pail or changing your grip.
Choose a Pedal Pail When Mechanical Simplicity Fits Your Setup
A foot-pedal pail's opening action is physical and visible: place a foot, press, deposit, and release. That physical feedback can be appealing for a repeatable routine at 2 a.m. or when multiple caregivers will use the pail. Still, verify the exact model rather than assuming every pedal behaves the same way.
Check:
- Whether the lid stays open only while the pedal is pressed.
- Whether the lid closes automatically after you release the pedal.
- Whether you must push the diaper through a flap or compression seal.
- How much pressure the pedal requires.
- Whether the pail shifts or tips when the pedal is pressed.
- Whether the pedal is reachable from your changing position.
Floor surface deserves particular attention. A reviewed handle-operated pail felt less stable on carpet than on a hard, level floor. That does not establish that pedal or sensor pails will behave the same way, but it is a useful reminder to assess stability where the pail will actually live—especially beside a changing table, chair, or bedside setup.
Treat a Sensor Pail as a Verification Purchase
A sensor pail may reduce the need to press a pedal or touch a lid, but do not assume that “motion activated” automatically means effortless while holding a newborn.
Before choosing one, read the current manual for the exact model and revision. Look for clear answers to these questions:
- What gesture or distance is intended to trigger the lid?
- Does the lid remain open long enough to deposit a diaper without rushing?
- What happens if the lid closes while you are still disposing of the diaper?
- What power source does it use, and how will you know it needs attention?
- Is there a manual opening method?
- Can the pail still be opened if its sensor does not respond?
- What cleaning is permitted around the sensor and lid area?
These questions are not evidence that sensor pails fail, drain batteries quickly, or lack manual controls. They are the practical details that determine whether a sensor mechanism remains useful when you are tired, carrying a newborn, or dealing with a missed drop.
A sensor pail is best suited to a household comfortable checking those maintenance and backup details before purchase. If you prefer a mechanism you can operate by feel without considering detection behavior or power status, a verified pedal design may be the easier fit.
Judge Odor Control by What Happens During Opening and Cleanup
No diaper pail should be expected to be odor-free every time it opens. The important question is how quickly the disposal path returns to a closed state—and how much work it takes to keep residue from building up.
In testing, the Diaper Dekor Plus had an internal flap behind its foot-pedal-opened lid. Testers reported that this extra layer reduced the immediate odor exposure compared with a Diaper Genie-style opening. That is a useful design feature to examine, but it does not establish that all pedal pails control odor better than sensor pails.
For either mechanism, inspect the full closure routine:
What to Check |
Why It Matters During One-Handed Changes |
Lid-closing action |
You want to know whether it closes on release, requires a hand, or relies on a timed mechanism. |
Inner flap or seal |
An extra barrier may help limit exposure while the outer lid is open, but it can add a push-through step. |
Disposal-channel access |
Missed drops and smears are easier to manage when the surfaces you need to clean are reachable. |
Cleaning instructions |
Follow the manufacturer’s method for the lid, interior, seals, and any electronic components. |
Odor-maintenance parts |
Check whether filters, cartridges, or other replaceable parts are required. |
Cleaning is part of odor control, not a separate chore. Testers of one plastic pedal pail reported odor absorption after several months and suggested periodic hose-and-vinegar cleaning for that model. Treat that as a model-specific experience, not a universal schedule. Your shortlisted pail’s manual should be the authority on what cleaners and maintenance steps are appropriate.
Compare Bag Changes Before You Compare Capacity
A large pail sounds convenient until it is time to empty it while holding a baby or managing a busy household. Capacity only helps if the bag system is manageable enough that you will keep using it correctly.
Some pails use proprietary continuous-refill systems. For example, the Diaper Dekor Plus system described in testing requires the user to pull down the bag, cut it with the included kid-safe blade, knot the full portion, then pull down and knot a new section. That can make daily diaper disposal simple, but it adds a specific routine at emptying time. One review estimated its refill cost at about 1 cent per diaper; actual costs depend on refill pricing and use. 
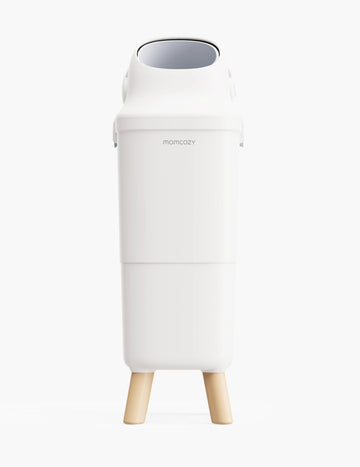
Other pails use ordinary trash bags. The handle-operated Momcozy Triple-Seal Diaper Pail, which is neither a foot-pedal nor a sensor model, is specified to work with most standard 13-gallon trash bags rather than requiring proprietary refills. Review the documented bag-compatibility details for any model you are considering, because bag fit can vary by construction.
Before deciding on a mechanism, verify:
- The bag or refill type required.
- Whether refills are proprietary.
- The emptying sequence.
- Whether you must cut, tie, thread, or reset a bag.
- The stated capacity for newborn-size diapers.
- How easily you can lift and carry a full bag from the pail.
Recheck the Setup as Your Baby Becomes Mobile
Your newborn will not stay newborn-sized forever, and the pail’s placement matters more once a child can crawl, pull up, and investigate handles or lids.
Keep the pail stable and within practical reach of the changing area, but do not assume any pail is childproof. Review the current manual for placement guidance, locking features, and cleaning directions. A child lock, when a specific model includes one, is a feature to understand—not a reason to stop supervising or to assume a child cannot access the pail.
Use this final checklist before buying:
- Can I open, load, and close it while holding a newborn?
- Does the pail remain stable on my actual floor surface?
- Does the disposal opening require an extra push-through action?
- Can I follow the refill and emptying routine without creating another frustrating task?
- Does the exact manual explain closure, cleaning, power needs, and backup operation clearly?
Choose a pedal pail if its verified mechanical operation and floor setup feel easiest for your body and routine. Choose a sensor pail only if its documented response, power needs, manual backup, and closing behavior match your tolerance for maintenance. Once you have narrowed the pail down, use the same checklist when setting up a practical changing station that keeps diaper changes, feeding supplies, and newborn care essentials within easy reach.