


MEDICALLY REVIEWED BY

Talia, OBGYN, master’s degree holder, IBCLC
A board-certified OBGYN, master’s degree holder, and IBCLC. As a mom who exclusively breastfed for 2 years, I bring both clinical expertise and real parenting empathy to my work.
I’ve supported 20,000+ postpartum parents with evidence-based breastfeeding guidance—from latching & positioning to lactation medication safety. 90% of my clients build sustainable feeding routines, and I’ve partnered with 2,000+ families to boost breastfeeding rates and satisfaction.
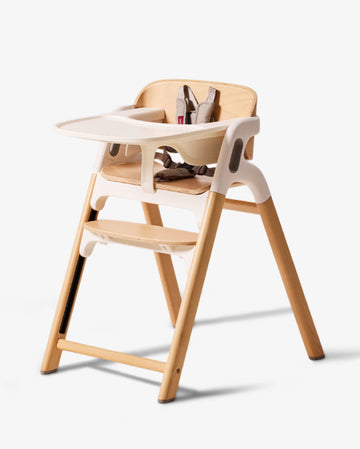
The simplest way to reduce tray scratches is to keep the surface as clean, smooth, and dry as possible, use softer feeding tools when you can, and lift suction bowls off gently instead of sliding them. Scratches matter because damaged food-contact surfaces can trap residue, which makes cleaning less effective and can create harborage sites for germs.
What usually causes scratches
Metal utensils are the biggest everyday risk, because harder tools can abrade a tray surface. Repeated suction bowl use can also wear a tray over time, especially if the bowl is dragged, twisted, or removed by pulling across the surface instead of releasing the seal first.

A tray that already has scratches, cracks, or rough spots is more likely to keep getting damaged. Those flaws can also interfere with suction and make the bowl harder to place cleanly.
Set up the tray before each meal
Start with a clean tray. The CDC says to clean highchair trays with hot, soapy water, then rinse and sanitize just before and right after each use for eating. Dirt and residue can interfere with cleaning and sanitizing, so this step helps more than it seems at first glance.
If you use a suction bowl, place it only on a smooth, non-porous, dry surface. Wipe away food particles, oils, or residue first, since those can break the seal and increase the chance of dragging or repeated re-positioning, which can leave marks. A gentle, fragrance-free wipe like 99% Water Baby Wipes - Higher Level of Purity can be useful for removing residue before drying the surface.

Good setup habits
- Clean the tray before mealtime.
- Make sure the tray is dry before attaching a suction bowl.
- Center the bowl and press from the middle outward to push out air.
- Check the seal with a gentle tug before you let your child start eating.
Use softer tools and gentler bowl handling
If you can choose between utensils, soft-tipped or silicone utensils are the safer bet for reducing abrasion. Avoid metal utensils on the tray surface.
For suction bowls, the removal motion matters just as much as the setup. Lift one edge to break the seal first, then remove the bowl without prying or sliding it across the tray. Sliding can drag debris and create linear scratches.

Keep cleaning gentle but consistent
After meals, remove loose food right away and wipe away any film so it does not sit on the tray. The CDC emphasizes cleaning with soap and water before sanitizing for food-contact surfaces.
For sanitizing hard surfaces like highchair trays, CDC notes a weakened bleach solution of 1 tablespoon unscented bleach per gallon of water or an EPA-registered sanitizing spray. If you use the bleach solution, the surface should stay fully wet for at least 2 minutes, and you should not rinse afterward.
Cleaning habits that help protect the surface
- Wipe off residue after each meal.
- Don’t scrub with harsh tools that could add more wear.
- Let the tray dry fully before the next use.
- If the tray is dishwasher-safe, use the dishwasher only if the manufacturer allows it. CDC notes that hot water and a heated drying cycle can sanitize some infant feeding items, but tray compatibility still depends on the tray itself.
Know when scratches are a hygiene issue
Not every scratch means the tray has to be replaced right away, but visible chips, scratches, and rough patches are a warning sign if they make the surface harder to clean. FDA inspection findings have treated scratched direct food-contact surfaces as problematic because they are not easily cleanable.

The practical line to watch is simple: if the tray still cleans smoothly and the scratches are only cosmetic, you may just need better setup and gentler handling. If the surface starts feeling rough, traps food, or makes suction bowls fail repeatedly, it is time to stop using that setup and consider replacing the tray or switching to a smoother, non-porous feeding surface. That last part is a practical inference from the cleaning and suction guidance, not a specific CDC or FDA tray-replacement rule.
A simple routine that usually works best
- Clean the tray with hot, soapy water before mealtime.
- Dry it well.
- Place suction bowls only on smooth, clean, non-porous spots.
- Use silicone or soft-tipped utensils instead of metal.
- Lift suction bowls to release them rather than sliding them off.
- After eating, wash, sanitize, and dry the tray again.
Takeaway
If you want fewer scratches, focus on three things: a clean, dry tray, softer utensils, and careful suction-bowl removal. That combination is the most practical way to protect the surface while still keeping mealtime easy.








