Using a hands-free pump should be easy. The most frequently occurring cause of a session becoming an every-minute adjustment is small placement errors. The initial habit to learn is how to wear the Momcozy breast pump models correctly. Wear the bra before other clothes and loosen the straps; put the pump in before tightening the straps.
This order allows the flange, bra, and breast to come together rather than overlap. In addition, each model of pump is designed to fit slightly differently on your body. The right bra for your pump really does make a difference.
The logic of the order, 6 clear steps, and a fit checklist are provided below. You will also discover bra matchings for every pump and responses to the parents' most often asked questions.
Key Principle: Straps Loose First, Tighten Last
The majority of fit issues are related to timing. This section will tell you what to do with the straps, how they work best, and which ones to avoid.
Unbutton Shoulder Straps to Allow Flange, Bra, and Breast to Sit Together
Loose shoulder straps allow the bra cup to move around. With that movement, your breast easily and naturally drops into the flange tunnel. It also allows the pump to self-locate. If you have a loose strap, use it for a short setup time. Tighten only when everything is feeling seated.
Recommended Order: Put On the Bra, Then Straps Loose, Then Insert the Pump, Then Tighten Last
Simple is the best order. Wear the bra with the straps untightened. Now open the nursing hole and insert the pump. Secure it snugly and stretch the straps slowly so that it fits tightly and firmly. ighten only after the pump is seated. You are adjusting tension, not correcting a mistake.
What Not to Do: Bra On, Straps Tightened, Then Insert the Pump
Many parents do it the other way around, and there's really no surprise why. The most frequently made error is tightening the straps prior to the pump's insertion. Your cup fits so tightly to your body, there is no space to center the flange. This means that you have to push and shove the pump into place, and it's often not the same balance as you would like.
Why the Order Matters
You can alter the overall feeling of your session by making a minor change in sequence. The benefits of the loose-first method are the main ones above.
Better Alignment from the Start
It's easier to align your nipple in the center of the tunnel of the flange while the bra still has a bit of stretch to it. This will be your first good shot! Similarly, a good beginning is establishing the rest of the session.
More Comfortable, More Stable Wear
A pump positioned in front of the straps will remain in place when the straps are tightened. Tightening afterwards will add support but not change the angle. This is typically easier on a longer session.
Fewer Steps to Get Right
The above method assigns one task to each step. Don't have to make judgments about the tension of a strap while placing a flange! When you are pressed for time, you have fewer decisions to make if you do one thing at a time.
Less Re-Adjusting Mid-Session
No one wants to have to mess with a hands-free pump in the middle of a session. A correctly placed and fixed pump has much less chance of requiring repairs. You can sit back and enjoy, knowing that the pump is working.
What Goes Wrong When You Tighten First
Before you put it in, you may experience a few minor issues that add up for you:
- Off-center flange: The pump isn't centered on your breast but is off to one side.
- Misaligned nipple: Your nipple is not in the center of the tunnel, which can feel uncomfortable.
- Cup pressing the flange: If the cup fits tightly, it can press the flange, which will change the angle of the flange.
- Sagging: The pump can fall with each shift in the breast or filling in.
- Repeat adjustments: You find yourself undoing and redoing adjustments over and over.
Six Steps to Wear Your Momcozy Pump
Each time you pump, follow these six steps. Once mastered, the routine will only take a minute or so.
Step 1: Put On the Bra
1. Put on the nursing bra, keeping the shoulder straps relatively loose. Do not tighten the straps too much at this stage; keep them comfortable to allow for easier adjustments later.

Step 2: Open the Nursing Opening
Remove the cup or fold it down (as per bra type). Fully settle your breast in the cup, without folding it or tucking it under. The next step will be much simpler if you're in a relaxed, natural position.

Step 3: Insert the Pump
Position the assembled pump to your breast, with your nipple in the center of the flange. Spend a second to make sure it is level as you release it. If it does not feel right, move it now, as your straps are still loose.

Step 4: Fix the Pump in Place
Tighten the closure on the clip or fastening to keep the pump from moving in your bra. The pump should be held up by the cup and not just your hand. Also, this is a great opportunity to make sure there's no pinching going on.

Step 5: Adjust the Straps
Tighten the shoulder straps gradually, moving from loose to snug. Stop as soon as the pump feels supported. Pulling the straps harder will not improve placement, and it can add pressure.

Step 6: Check the Fit
Do a final check before you start:
- The flange is centered over your nipple.
- Your breast is not compressed or pinched.
- The pump feels stable when you move slightly.
Loosen the straps, reset the pump, and tighten again if any of these feels off.

Fit Checklist Before You Start Pumping
You might save yourself the trouble of making a mid-session adjustment with a quick look before hitting the start button. These are the signs that you should watch for.
Right Size: Cup Snug, Never Tight
The cup should have the pump close to you without squeezing the breast. If your bra is too small or your straps are too tight, you will have dents, red marks, or be pinched.
Flange Centered: Nipple in the Middle of the Tunnel
Check by looking down or with a mirror to make sure the nipple is in the middle of the flange tunnel. The best indication of a successful setup is a centered nipple.
No Pressure: Breast Not Squeezed or Sore
You should not experience pain when you pump yourself. If you feel pressure, soreness, or pinching, STOP and reposition. If the pain continues, it's worth talking to a lactation consultant or your health care provider.
No Slipping: Tighten Straps Slightly or Choose a More Supportive Bra
If the pump moves down, tighten straps slightly. But if the bra continues to slip, it's not providing sufficient support. A more supportive nursing bra usually solves the problem better than overtightening.
Tips for an Easier First Wear
The first couple of sessions are your learning curve. Here are two tips that can help make that stretch smoother.
First Time: Set Up in Front of a Mirror.
The flange position, strap tension, and bra shape can all be seen in a mirror. After a couple of sessions, you'll find the correct placement by feel. In the meantime, the mirror helps make your first attempts quicker and less stressful.
Easy to Remember: Put On, Insert, Tighten
The only rule to remember is: put on, insert, tighten! Straps should be loose first and tight last. This is simple to repeat, even when you're tired or rushed.
Match Your Momcozy Pump to the Right Nursing Bra
The right bra will support the pump, hold it in place, and make loose-first easier to work with. Here are the pairings to consider for each pump.
M5 Smart + Ultra Soft Seamless Nursing Bra
If you're using the M5 Smart, the bra you should check out is the Ultra Soft Seamless Nursing Bra. It's simple, fits a pump positioned near your body, and is soft enough for extended wear. As with any bra, make sure that the cup is not too tight on your breast. The Momcozy bra for M5 Smart Breast Pump guide covers this pairing in more detail.


M9 + Jelly Strip Seamless Nursing Bra
The Jelly Strip Seamless Nursing Bra can be worn with your M9. Support matters most with a pump that carries some weight. Check the stability of the pump after the straps have been pulled tight. If the strap tension changes, adjust the tension prior to making any changes. This M9 nursing bra guide delves more deeply into the match.
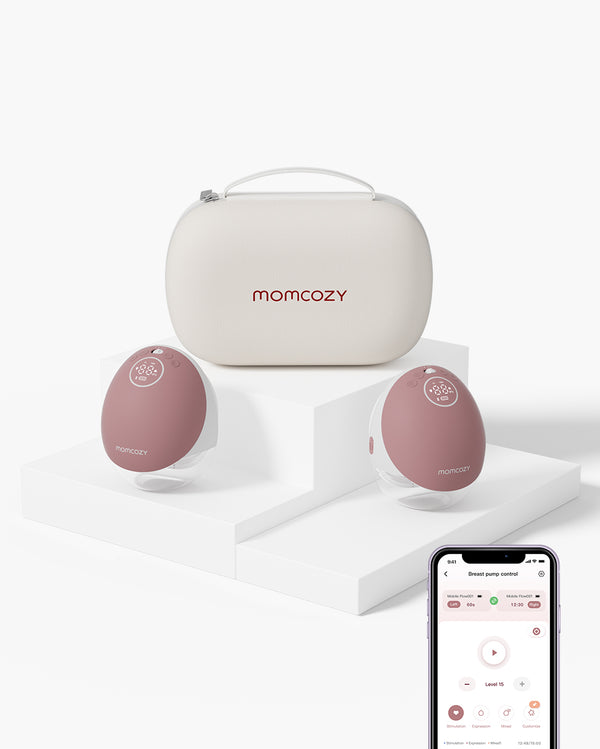
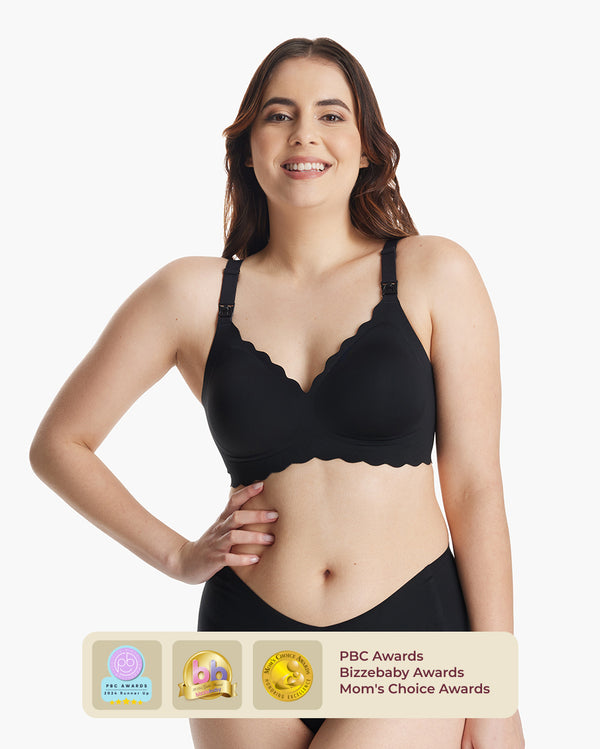
W1 + Busty Cotton, Soft U.S. Cotton Seamless Maternity Bra, or AirMesh
For W1 users, there are a couple of great choices: the Busty Cotton bra, the Soft U.S. Cotton Seamless Maternity Bra, or the AirMesh bra. Cotton styles are one of the most popular clothing options when it comes to everyday comfort. Similarly, if you're looking for something lighter, you should check out the AirMesh bra. Whichever you choose, follow the same order: straps loose, pump in, tighten last. The bra pairing guide for the W1 explains what to look for.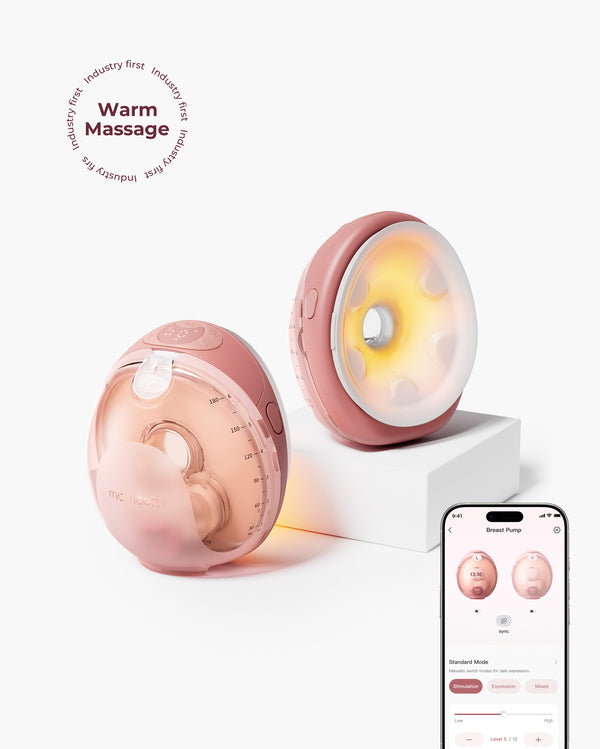

$540.00code ÉCONOMISEZ 20%

Bra Size vs. Flange Size
Bra size is different from flange size, so it is best not to confuse them. Flange size is set by nipple diameter, not by your bra size. Measure your nipple across at the base, then match it to the flange chart. Your bra size only decides how steadily the pump sits once the flange is right. In addition, the correct flange won't remain in position in a too-loose bra. If you have any doubts, a lactation consultant can check both.
Before Your First Session
A few minutes of preparation will make your session clean and comfortable. Do these three things first before wearing your bra.
Wash Hands and Use Clean, Dry Parts
Have clean hands and clean pump parts at the beginning of each session. The CDC’s guidance on cleaning breast pumps includes cleaning the parts that come in contact with milk after every use and using clean hands to clean them. The Office on Women’s Health also suggests washing hands before pumping and maintaining a clean environment for pumping. Follow all the instructions for cleaning and care in your pump's manual.
Assemble the Pump Before You Put On the Bra
Assemble the pump before you put on your bra. It's difficult to see what you're doing while you're putting the pump together with the bra on. It can also pull the cup out of position. It's easier to insert a fully assembled pump.
Stay Upright While Pumping and Avoid Bending Forward
The pump will remain in place if it is sitting or standing up straight. When bent forward, the angle will change and may cause a shift in flange position. It can also cause milk to flow in ways you didn't expect. If leaning is necessary, inspect the position of the pump afterwards.
FAQs
Do I Put the Pump In Before or After Tightening the Straps?
Put the pump in first, and then tighten. With loose straps, the cup can move, and the flange can be positioned in the correct place before support is added.
Should I Size Up My Bra for Wearable Pumping?
You may need a little more room in the cup as the pump contributes volume. The cup should still have a snug fit, but not so tight that it hurts to wear. If there is a size range, then take both and see which size will maintain the stability of your pump without applying pressure.
Can I Use Any Nursing Bra with a Momcozy Wearable?
Not all nursing bras fit all pumps well. Ideally, choose a bra that will support the additional weight and help keep the pump in the middle. Pairings listed above are a good reference point. Each model’s bra guide also goes into more detail.
What If the Pump Slips After I Tighten the Straps?
First, untighten the straps and ensure that the flange is centered. Then, tighten slowly again. If the pump does not fit, your bra might need to be more supportive. It's also a good idea to ensure that the cup isn't too large, as this can cause constant slipping, and to adjust the strap tension before you assume this is the problem.
Can I Nurse in the Same Bra Right After Pumping?
For a lot of nursing bras, it may be possible to remove it for feeding. Ensure that the cup is in its usual position and that there is no pinching or pressure on your breast. If you have any questions about feeding, pumping, or pain, you can get information from a lactation consultant or your pediatrician.
Conclusion
The secret to wearing your Momcozy pump is one thing: straps loose first, snug last. Wear the bra and open up the cup, then slide the pump into the cup and secure. Slowly tighten and test for fit. A comfortable pump and a fast pre-session regimen make the process easier.
Change position if uncomfortable or if it doesn't feel right. Discuss any continued concerns about comfort, fit of the flange, or milk production with a lactation consultant or your healthcare provider.