If you are searching for how to put on compression socks styles without a struggle, the key is to position the heel first and work the fabric upward in small sections. Pulling from the top can overstretch the socks, while rolling them like an ordinary socks can create tight bands. The seven-step method below helps the garment sit smoothly from toe to calf. You will also learn how to check the fit, remove the socks gently, and recognize when professional advice is needed.
Prepare Before You Start
Good preparation makes compression socks easier to apply and helps prevent bunching, twisting, and excess pressure. Before you begin, confirm that the socks' size, length, and compression level match your needs. Compression is not one-size-fits-all: socks that is too small may feel painfully restrictive, while one that is too large may wrinkle or fail to provide the intended support.
Put the socks on early in the day, ideally before your legs have had time to swell. Sit on a stable chair or the edge of a bed where you can reach your feet without losing balance. Your skin should be clean and dry. If you use moisturizer, let it absorb fully first because damp or slippery skin can make the fabric harder to control.
Remove rings and bracelets that might snag the knit, and check your fingernails for rough edges. Rubber donning gloves can improve grip and let you smooth the fabric with your palms instead of pinching it. If bending or hand strength is limited, ask a clinician or medical-supply specialist about a stocking donner or another assistive device.
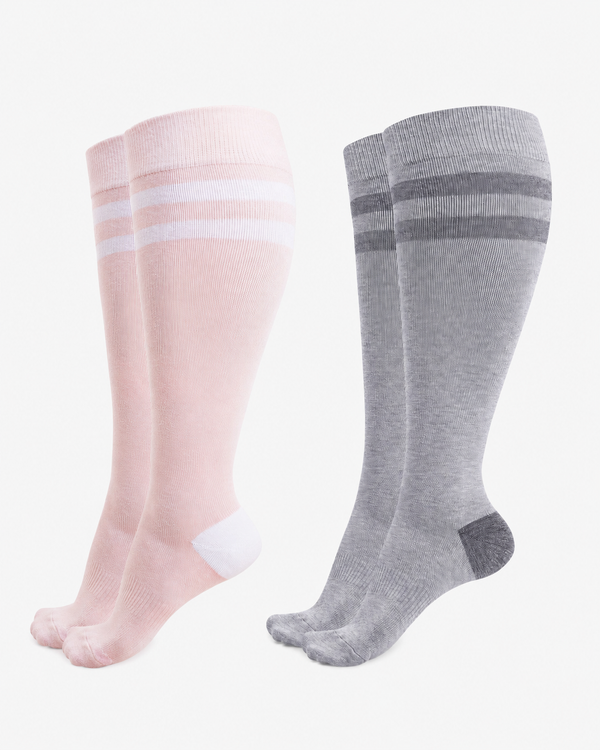
Choose the product only after checking fit and pressure, and you can browse Momcozy's socks collection to compare styles side by side. The Momcozy Compression Socks for Women Wide Calf are positioned for pregnancy and postpartum comfort and currently come in extended calf-friendly sizes. For sports, travel, or long periods on your feet, the Momcozy Wide Calf Compression Socks 20–30 mmHg for Sports provide firm graduated compression, with the strongest pressure at the ankle and less pressure higher on the calf. Because 20–30 mmHg is a firm level, confirm that it is appropriate for you if you have a health condition, are pregnant, or have been advised to use medical compression.
Safety note: Ask a healthcare professional before using compression socks if you have peripheral artery disease, severe leg swelling, reduced sensation, neuropathy, open wounds, an active skin infection, or unexplained one-sided pain or swelling. Consumer compression socks should not replace hospital-prescribed anti-embolism stockings.
Graduated Compression
Soft and Breathable
Snug Fit
Pregnancy & Postpartum
The Easy Way to Put on Compression Socks
The easiest method is to turn the socks inside out only as far as the heel, seat the foot and heel correctly, and then ease the remaining fabric up the leg. This approach follows the general donning sequence described by medi's compression-garment guidance and NHS patient instructions. Do not gather the whole socks into a tight ring or pull them up by the top band.
Step 1: Sit Safely and Find the Heel Pocket
Sit with both feet supported and unfold the socks completely. Identify the toe, heel pocket, and top band so you know how the garment should align. If the socks has a label or pattern that indicates the back, orient them before starting. Make sure there are no objects inside the socks and that the fabric is not already twisted.
Step 2: Turn the Socks Inside Out to the Heel
Reach into the socks and pinch the center of the heel pocket. While holding the heel, pull the top of the socks downward so the garment turns inside out up to—but not beyond—the heel. The foot section should remain as a small pocket. This creates a short opening that is much easier to place over the toes than the full length of the socks.
Step 3: Open the Foot Section and Insert Your Toes
Use both hands to widen the opening without digging your fingernails into the fabric. Slide your toes into the foot pocket, keeping them straight and relaxed. For closed-toe socks, move the fabric far enough forward that your toes are covered without being cramped. For an open-toe style, align the front edge according to the product instructions.
Step 4: Place the Heel Correctly
Pull the foot section over the arch until your heel sits fully inside the heel pocket. Check both sides before moving upward. If the heel pocket is under the arch, above the heel, or turned sideways, stop and reposition it now. Correct heel placement anchors the socks and helps the graduated compression sit in the intended areas.
Step 5: Ease the Fabric Over the Ankle
Bring the turned-down portion over the heel and ankle. Use your thumbs or gloved palms to move a small amount of fabric at a time. The ankle is often the most resistant area because graduated compression is typically strongest there. Avoid yanking the top band, which can stretch the knit unevenly and leave extra fabric near the ankle.
Step 6: Work the Socks Up the Calf in Sections
Continue upward a few inches at a time. Alternate hands around the front, sides, and back of the leg so tension stays even. Use your palms to lift and guide the fabric rather than pinching and tugging it with your fingertips. For knee-high socks, stop when the top band lies flat below the bend of the knee.
Step 7: Smooth the Socks and Recheck Alignment
Run your palms from ankle to calf to remove wrinkles and distribute the fabric evenly. The heel should still be centered, the socks should not be twisted, and the top band should lie flat rather than folded or rolled. If you find a wrinkle, do not simply pull harder from the top. Move the surrounding fabric gradually until the crease disappears.
Helpful Tips for Putting on Compression Socks
Small changes in timing, grip, and technique can make compression socks much easier to put on. If the seven-step method still feels difficult, try the following:
-
Start before swelling develops. Morning application is usually easier because the lower legs tend to be less swollen after rest. If pregnancy-related swelling is making daily activities uncomfortable, these practical strategies for reducing swelling in pregnancy explain when home measures may help and when symptoms need medical attention.
-
Keep the skin dry. Apply lotion at night or wait until it has fully absorbed. A light dusting product may be appropriate for some users, but follow the sock maker's care instructions and avoid products that irritate the skin.
-
Use rubber gloves. Textured household or medical donning gloves improve grip, protect the fabric from fingernails, and help spread pressure through the palms.
-
Rest your hands between sections. Pause after fitting the heel or ankle if your grip is tiring. Rushing often leads to uneven tension or twisted socks.
-
Try a donning aid. A rigid frame, fabric slider, or other applicator may help people with limited reach, arthritis, weakness, or reduced mobility. Ask for a demonstration so the device is used correctly.
-
Recheck the size. Persistent difficulty can indicate more than a technique problem. Measure the ankle and calf according to the brand's size chart, preferably before swelling increases, and confirm the correct sock length.
-
Follow the garment instructions. Open-toe, thigh-high, maternity, prescription, and zippered compression garments may require a different method from the knee-high closed-toe technique above.
How Do You Know if Compression Socks Are on Correctly?
Correctly fitted compression socks feels snug and supportive without causing pain, numbness, tingling, or color changes. The fabric should sit smoothly against the skin, with no folds, twists, or bunched sections. Your heel should fill the heel pocket, and the top band of knee-high socks should rest flat below the knee without rolling.
Check your toes shortly after application and periodically during wear. They should retain their normal color and temperature. The socks should not leave a deep, painful groove or create a tourniquet-like band. Mild, temporary impressions can occur with close-fitting garments, but pain or changes in sensation are warning signs rather than proof that the compression is "working."
Remove the socks and contact a healthcare professional if your toes become numb, painful, unusually cold, pale, blue, or dark; if swelling suddenly worsens above the garment; or if the skin becomes damaged or severely irritated. Alberta Health Services' compression-stocking guidance likewise advises seeking care for toe numbness, pain, color changes, or skin irritation.
What Not to Do While Wearing Compression Socks
Avoid folds, wrinkles, and rolled cuffs because they concentrate pressure in a narrow area. A smooth fit is part of safe compression wear; more pressure is not automatically better.
- Do not fold the top band down to shorten the socks.
- Do not roll the socks into a tight ring around the ankle or calf.
- Do not layer two compression socks unless a healthcare professional specifically instructs you to do so.
- Do not cut, alter, or stretch the garment to change its fit.
- Do not ignore pain, numbness, tingling, cold toes, discoloration, or new skin irritation.
- Do not apply socks over an open wound or active infection unless your clinician has provided wound-care instructions.
- Do not sleep in compression socks unless your healthcare professional or prescription specifically requires nighttime wear.
- Do not use someone else's prescribed compression garment; size, length, and pressure are individualized.
Follow the washing and drying instructions on the product label. Heat, fabric softener, bleach, and rough handling can damage elastic fibers in some garments. Replace socks when they lose elasticity, no longer stay in place, or remain wrinkled despite correct sizing and application.
How to Take Off Compression Socks
Remove compression socks by peeling them downward in sections, not by pulling hard on the toe. Sit safely, grasp the top band with both hands, and fold it down over itself. Continue guiding the socks toward the ankle with your palms, keeping the pressure even around the leg.
Once the fabric reaches the ankle, ease it over the heel. Then slide the foot section off without twisting the toes. If the socks catch at the heel, pause and loosen the surrounding fabric rather than tugging from the toe. Rubber gloves can provide better control during removal as well as application.
After taking the socks off, inspect the skin for persistent redness, blisters, broken areas, or unusual color changes. Wash and dry the garment according to its care label, and let your skin dry before putting on a fresh pair. If you have been prescribed continuous or post-surgical compression, follow the removal schedule given by your care team rather than a general daytime routine.
Frequently Asked Questions
Q1: Why Are Compression Socks So Hard to Put On?
Compression socks are intentionally tighter than ordinary socks, especially around the ankle where graduated pressure is usually greatest. They can feel harder to apply if your legs are already swollen, the size is incorrect, the fabric is gathered into a tight roll, or hand strength and mobility are limited. Applying them early, using rubber gloves, and turning the socks inside out only to the heel usually reduces the effort. Repeated difficulty despite good technique is a reason to recheck sizing or ask about a donning aid.
Q2: Why Should You Put Compression Socks on in the Morning?
Morning is often recommended because leg swelling is usually lower after lying down overnight. Putting the socks on before prolonged standing or sitting allows the garment to fit more evenly and support the leg as the day begins. This is a general routine, not a universal medical schedule; shift workers and people with prescribed treatment plans should follow their clinician's timing advice.
Q3: How Many Hours Should You Wear Compression Socks During the Day?
There is no single correct number of hours for everyone. For general daytime use, many people put compression socks on in the morning and remove them before bed. Your ideal schedule depends on the reason for wearing them, the compression level, your health, and your clinician's instructions. The Guy's and St Thomas' NHS compression-stocking guide advises wearing prescribed stockings as directed and not sleeping in them unless told to do so.
Q4: Should I Wear Compression Socks if I Have Neuropathy?
Ask a healthcare professional before wearing them. Neuropathy can reduce the ability to feel excessive pressure, rubbing, heat, or early skin injury. Compression may still be appropriate for some people, but the pressure level, fit, skin condition, circulation, and monitoring plan need individual assessment. If use is approved, inspect the skin and toes regularly and remove the socks promptly if you notice pain, discoloration, temperature changes, or new irritation.
Put Compression Socks On Correctly With Less Strain
Correct technique turns compression-socks application into a controlled sequence: prepare dry skin, expose the heel pocket, fit the foot and heel, guide the fabric over the ankle, and smooth it up the calf. Never accept pain, numbness, or a rolled band as normal.
Start with the right size and an appropriate pressure level, then use the seven-step method consistently. If pregnancy or postpartum needs are part of your decision, choose a size and compression level that specifically support those needs. For prescription compression, circulation concerns, neuropathy, or persistent fit problems, use your healthcare professional's guidance as the deciding standard.