


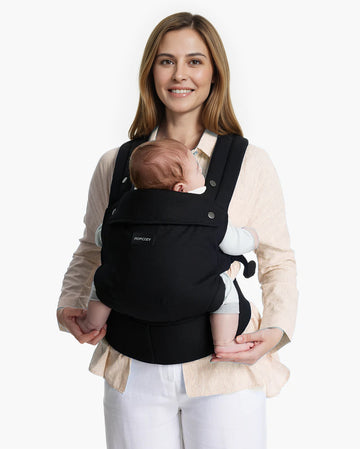
You’ve buckled your baby carrier, adjusted the straps, and thought you were ready to go., but suddenly, the carrier still feels loose and uneven a few minutes later. You followed the usual steps, but somehow, the waistband keeps rotating, your baby slowly drops lower, and your one shoulder starts to burn. It is so confusing right? But these signs do not mean to tighten everything harder. Sometimes it’s telling you to fix a fit issue.
Before you adjust your carrier, check if the fit is in the right order. First the carrier compatibility and condition, waistband, baby position, panel or seat, and finally the shoulder straps. The best way to know how to use a baby carrier safely is when you understand the importance of acknowledging what is working and what is not. If you notice pain, numbness, breathing concerns, persistent slumping, damaged buckles, or an incompatible carrier size, stop using it and reassess the fit.
Key Takeaways
- A reliable baby carrier fit starts with a secure, level waistband before baby position, panel height, and shoulder straps are adjusted.
- A baby sitting too low may increase shoulder loading and can make face visibility and airways more difficult.
- Shoulder discomfort can result from uneven tension, straps sitting near the neck, a high cross, or baby leaning away from the caregiver.
- A waistband that slips may be too loose, angled forward, placed poorly for the wearer’s body, or paired with an unsuitable carrier size.
- Fit should be rechecked after caregiver changes, growth spurts, clothing changes, feeding, sleep, or any visible loosening during wear.
- Stop using the carrier when pain, numbness, damaged hardware, persistent slumping, breathing concerns, or an unresolved size mismatch is present.

Start With the Symptom, Not the Strap
If your baby carrier suddenly feels loose or uncomfortable, don’t just immediately pull on the straps. Start with identifying what changed. What moved? Where is the pressure? Is your baby moving downward, leaning to one side, folding forward, or sitting farther away from your body?
A fit issue may also come from using the wrong carrier size, a damaged component, an incompatible carry mode, or a product limitation. If you change several straps at once, it can be even harder for you to identify the major problem.
You can reset the carrier and adjust one stage at a time while checking the baby’s position after each change. This way, you can distinguish what actually works for the fit and what doesn’t.
The 30-Second Baby Carrier Fit Check
Before you start moving, take 30 seconds to check the carrier and your baby’s position. This quick routine can help you catch problems early on and identify baby carrier safety and T.I.C.K.S checks to help you make small adjustments before discomfort develops.
- Check the carrier condition and configuration. Make sure the buckles are intact, the webbing is not damaged or twisted, and the carrier is set to the correct mode and seat width for your baby. You may follow the product manual for specific settings.
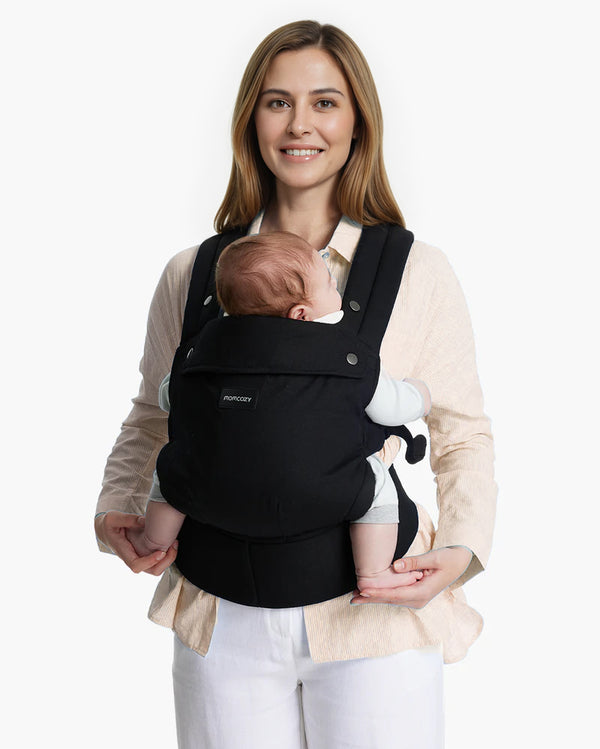
- Check your baby’s position. Your baby should be high enough for easy monitoring, with their face visible, chin off the chest, and back supported without slumping. Their seated position should match the carrier’s instructions.
- Check the waistband. Make sure it sits at the appropriate height and feels stable around your body. The weight should feel centered rather than pulling noticeably to one side.
- Check the shoulders strap. The straps should lie flat without twists and feel evenly tensioned. Neither side should carry noticeably more weight.
- Check movement. Take ten gentle steps and see whether your baby shifts, sinks, or leans. If their position changes, stop and adjust one part at a time.
Why the Waistband Keeps Slipping—and What to Adjust First
If your waistband keeps slipping, the first thing you may usually do is to tighten it. But insufficient tension, forward tipping, poor placement for torso or pelvis shape, clothing friction, hidden slack, a baby sitting too low, or an incompatible carrier size can all affect the security of the waistband.
You can start adjusting the waistband in this order:
- Support the baby: Support your baby with a gentle hand as you make adjustments, he/she remains comfortable.
- Level the waistband: Make sure the waistband sits on the center of your body and it doesn’t tilt or twist.
- Choose a stable height permitted by the manual: Position the waistband at the height recommended for your carrier and your baby’s size.
- Remove slack: Gently tighten the waistband to take up any loose webbing without making it uncomfortably tight.
- Buckle securely: Fasten the buckle and give it a quick check to make sure it is properly secured.
- Reload weight and recheck: Settle your baby back into place, then check if the waistband still feels stable and comfortable before you start moving.

Keep in mind that tightening is not always the answer. A secure waistband should stay stable while allowing comfortable movement. If it continues to slip after correct adjustments, check whether the carrier’s size configuration, or fit is appropriate for you and your baby.
Why Shoulder Straps Hurt or Pull Toward the Neck
Carrying comes along with different pain points. Neck pressure can mean the shoulder straps are sitting too close to your neck, while armpit digging can happen when straps are too tight or positioned too far inward. A one-sided burning sensation may signal uneven tension, while forward shoulder pull or strap lift-off can happen when your baby sits too low or too far from your body.
Position matters because when your baby sits low or far away from your body, the more your shoulders must resist the forward pull. Keeping the baby close and well-positioned can help for comfortable carrying and back-support guidance, as well as reduce unnecessary strain.
For crossed-strap carriers, check for a centered lower cross with the straps spread comfortably over your shoulders. For other carrier systems, follow the model-specific back strap position recommended by the manufacturer.
When adjusting, tighten gradually and evenly, alternating between sides rather than fully tightening one side first. This helps maintain balanced support and prevents the baby’s weight from shifting.
If you experience persistent pain, numbness or weakness, stop adjusting. Reassess the situation, the pain can be from the carrying duration, so you may check how long can a baby be in a carrier. These signs can also mean that you may need help from a qualified fit professional or clinician rather than another carrier adjustment.
Baby Sits Too Low, Sinks, or Leans Away
When your baby sits too low, sinks into the carrier, or leans away from your body, check the waistband height, panel slack, and shoulder-strap together. If the base is sitting too low or the panel has excess slack, tightening the shoulder straps may pull the baby closer without correcting the underlying setup.
Instead of hauling the baby upward with the straps, you can reposition in this order:
- Support your baby first before you make adjustments
- Reset the carrier’s base
- Position the baby at the intended height
- Smooth out any excess panel fabric
- Adjust the straps gradually
If your baby is young, small, tired or asleep, play close attention to visibility and chin-to-chest positioning:
- Make sure your baby’s face is visible at all times
- Ensure that their chin isn’t pressed toward the chest
- Make sure that your baby is breathing comfortably
If the panel or seat cannot be adjusted to fit the baby correctly, the carrier may not yet be suitable, or the current configuration may be wrong. Follow the product manual for model-specific positioning and fit guidance.
Check the Seat, Panel, and Baby’s Centered Position
Carrier designs may vary, so start by checking your carrier’s seat width and panel height against the product manual or model-specific measurements provided by the manufacturer.
Before tightening the straps, smooth out any bunching or folds in the fabric and confirm that the baby is centered and evenly supported. Check that neither leg nor side is carrying more tension than the other.
A gentle pelvic tuck can help the baby settle into a supported position. Guide the baby’s bottom into the seat without forcing the hips outward or widening the seat beyond its intended setting. Make sure that there’s even support that follows the carrier’s design.
There are mode-specific baby carrier positions by age, so instead of applying one setup to every baby or stage, you can check what works best for your baby.
Use This Symptom-Fix Table
|
Symptom |
Check first |
Likely adjustment |
Stop/escalate when |
|
Waistband slides or tips |
Band level, slack, placement |
Support baby; rest and secure the base before straps |
Buckle/webbing damage, painful pressure, no stable position |
|
One shoulder hurts |
Symmetry and centered baby |
Loosen/rest; tighten both sides gradually |
Numbness, weakness, sharp or persistent pain |
|
Straps crowd the neck |
Cross/back-strap position |
Move straps outward and use the model’s intended position |
Design cannot remain off the neck |
|
Baby sinks too low |
Base height, panel slack, seat setting |
Reset waistband and baby before retightening |
Face obscured, chin on chest, persistent slumping |
|
Baby leans away |
Panel/strap slack, centered seat |
Bring chest closer without overtightening |
Breathing concern or poor fit despite reset |
|
Fit changes after handoff |
Previous caregiver’s settings |
Rest all key adjustment points |
Carrier cannot fit either caregiver safely |
Refit After Growth Spurts, Clothing Changes, and Caregiver Handoffs
Your saved carrier settings are not permanent. Your baby will grow, clothing layers add bulk, webbing can stay tightened, and a different caregiver can change how the carrier sits and carries the load. After any of these changes, take a moment to reset the fit instead of relying on the previous settings.
You can follow a simple reset routine:
- Loosen the carrier before loading
- Establish the correct waistband and baby height, check if the baby is centered, supported and positioned as intended
- Tighten the straps gradually and evenly
- Finish with a quick movement check to make sure the carrier stays secure
If growth, body shape, or clothing layers make the previous setup difficult to achieve, reset the carrier’s fit rather than forcing the existing settings. If you want specific considerations, you can follow the plus-size babywearing guide or the petite no-slip guide, as your references.
Applying the Fit Sequence to the PureHug X-Back Carrier
The X-back design is intended to spread the baby’s weight across multiple support points rather than concentrating the load in one area. The crossed shoulder straps may help distribute the tension across the upper body, while the waist and lumbar support can provide a stable base around your midsection, making carrying feel lighter and balanced.
If you’re using a PureHug ergonomic baby carrier back support, you can follow this consistent fit sequence:
- Waistband first: Secure the waistband before fastening the safety buckle.
- Baby centered: Set the carrier, position it facing inward and ensure the body panel is centered on your body.
- Crossed straps secured: When adjusting the shoulder strap length. Bring your left shoulder strap across your back and secure it in the right side buckle. Before doing the right side, position the baby properly, and lift the right strap and buckle it on the left side.
- Gradual even tightening: Check if the panel has no creases and your baby is in an ergonomic ‘M’ position before gradually tightening the straps to secure.
You can check the BC001 operations instructions for the exact buckle order and model-specific checks.

When Adjustments Is Not Enough
Some fit problems cannot be solved by making further adjustments. Stop and reassess if you notice damaged buckles or webbing, unexplained loosening, persistent slumping, face obstruction, any breathing concern, or caregiver pain or numbness. The same applies if the baby doesn’t fit with the carrier’s specification, or you don’t know what to do when baby hates the carrier.
When a fit can’t be corrected through product’s intended adjustments, return to the product manual or reach Momcozy Support for model-specific guidance rather than improvising. If individual health or infant development is involved, seek a babywearing educator or appropriate medical advice .
Remember that a properly adjusted carrier doesn’t replace active adult monitoring. Don’t assume that passing a fit check guarantees safe positioning for an unlimited period.
Frequently Asked Questions
Should I loosen the carrier before putting it on again?
Usually, yes, especially if the carrier was adjusted, folded, stored lightly, or used by another caregiver. Small changes can affect a baby's position and overall support, so before making assumptions based on the previous setting, it’s ideal to reassess first.
How often should I recheck baby carrier fit during an outing?
Recheck the fit whenever the baby wakes, feeds, moves significantly, changes clothing, or the carrier visibly loosens. A quick movement check can also help confirm that the baby remains centered and supported. For model-specific adjustments points or limits, follow the product manual.
Can thick coats or slippery clothing change carrier fit?
Yes. Bulky layers can add space between the baby and the carrier, while slippery fabrics may affect positioning and tension. Dress and layer according to the carrier’s safety guidance. If the fit no longer feels secure, you can stop and refit before continuing.
Why does the carrier feel uneven even when both strap tails look equal?
Equal strap-tail length doesn’t necessarily mean the carrier is balanced. Body asymmetry, strap tension, and baby’s position can all affect how the load feels. Center the baby, check the base and panel, then adjust tension as needed rather than using strap tails alone as a visual ruler.
Can I fix fit while baby is asleep?
Only make adjustments when you are monitoring and supporting your baby’s position and airway. If the baby is slumping, the face is obstructed, or visibility is uncertain, remove the baby and reset fit instead of attempting a blind adjustment. Check clear view, stable positioning, and comfortable support before continuing.
Conclusion
Knowing how to use baby carrier works best if you also know how to secure it. Star with a table, level base, followed by the right baby height and seat position. Smooth the panel, balance the straps, and finish by doing a movement recheck to confirm that the baby stays centered and supported.
When troubleshooting carriers, ensure that stability is improved without creating pain, pressure, slumping, or blocked visibility. If you’re comparing options, you may explore baby carriers collection and choose a style that best matches your baby’s stage and carrying needs, from newborn carriers, hip seat carriers or wrap baby carriers.








