


MEDICALLY REVIEWED BY

Mary Bicknell, MSN, BSN, RNC, ANLC
Mary Bicknell comes with over 30 years of experience as an RN in the NICU. Educating mothers on the importance of healthy breastfeeding is important to her. It can be challenging to maintain successful breastfeeding through many difficult situations and long hospitalizations. Mary is committed to helping families define what successful breastfeeding means to them; and to assist them to obtain their goal. After leaving the bedside, Mary became a nurse leader and continued to make sure that breastfeeding education and support was always available to the families in her unit.
You do not have to warm either expressed breast milk or prepared formula. Their preparation, storage, feeding-leftover, and discard rules are different.
The most reliable approach is to create two labeled routines: one for expressed breast milk and one for prepared formula. Use the warmer as a tool for consistent heating, then rely on labels, wrist checks, and timers to manage safety.
Build two routines, even if you use one warmer setting
A saved cycle—if your particular warmer offers that feature—is a convenience setting, not a safety setting. It can help you repeat a result for a familiar bottle setup, but it cannot identify what is in the bottle, when it was prepared, whether baby has already fed from it, or when it must be discarded.

Keep a short note on your phone or near the warmer for each routine:
Record |
Example |
Contents |
Expressed breast milk / prepared formula |
Bottle volume |
4 oz |
Starting state |
Refrigerated |
Bottle and nipple type |
The format used with your warmer |
Warmer setup |
The manual-approved water fill level and cycle |
Result check |
Evenly warm and comfortable on the wrist |
A practical saved note might read: “Formula: 4 oz, refrigerated, plastic bottle—use verified cycle; wrist-check before feeding.” Make a separate note for expressed milk, even if the final cycle happens to be the same.
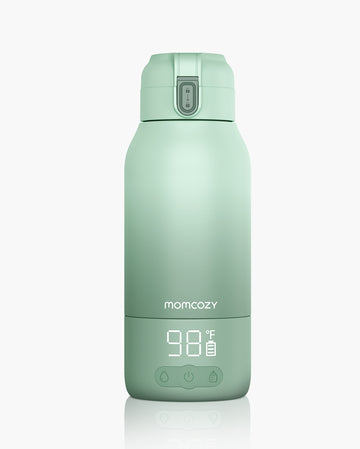
Do not rely on a generic time chart. Available manufacturer guidance describes warming times as variable with volume and whether a bottle starts frozen, refrigerated, or at room temperature. Check the current manual for your exact warmer before saving a routine, including compatible bottle formats, water-fill instructions, cleaning, descaling, and steam precautions. If you are considering a warmer, check whether the model supports the bottle format and workflow you use most; Momcozy’s bottle warmer collection is one place to review current options and model information.
Formula must be prepared safely before it is warmed
A bottle warmer heats a prepared bottle. It does not prepare powdered formula safely, make powdered formula sterile, or replace the instructions on the formula container.
For powdered formula:
- Wash hands and work with clean feeding equipment.
- Measure the exact amount of water listed on the product label before adding powder.
- Add the exact amount of powder specified by the label.
- Follow the product’s preparation and storage instructions before deciding whether to warm the bottle.

Powdered infant formula is not sterile. Families feeding premature, low-birthweight, immunocompromised, or otherwise higher-risk infants should follow their pediatric clinician’s guidance and the formula label’s preparation directions.
Ready-to-feed formula is a sterile liquid formula and does not require added water. Whichever type you use, warming remains optional. For formula preparation and bottle-feeding guidance, see the CDC’s powdered formula preparation instructions.
Warm gently—and verify the bottle, not just the display
A warmer display, timer, or completed cycle does not replace a hands-on temperature check. Feeding temperature is a preference; the goal is an evenly comfortable bottle, not a universal number.
A simple warming sequence
- Check the label first. Confirm whether the bottle contains expressed breast milk or prepared formula, and note the relevant preparation or warming time.
- Set up the warmer as directed. Use only the bottle types, water amount, placement, and operating steps specified in your model’s manual.
- Warm one bottle according to the verified routine. Avoid treating an unfamiliar bottle size or starting temperature as identical to your usual setup.
- Mix gently as appropriate. For expressed breast milk, swirl the bottle to recombine separated fat.
- Check before feeding. Place a few drops on your wrist. The liquid should feel warm, not hot.

Never microwave formula: microwave heating can be uneven and create hot spots that can burn a baby’s mouth and throat. Do not heat breast milk in a microwave or directly on a stove. The CDC’s breast milk handling guidance also recommends testing a few drops on your wrist before feeding.
Expressed breast milk: use a 2-hour timer after warming
For healthy, full-term infants outside hospital settings, expressed milk may be served cold, at room temperature, or warmed. Warming is optional. Human milk storage guidance notes that storage recommendations can differ for special populations and healthcare settings.
Once previously refrigerated or frozen breast milk has been brought to room temperature or warmed, its timing changes.
Bottle state |
What to do |
Warmed, but baby has not fed from it |
Use within 2 hours after warming or bringing it to room temperature. |
Baby fed from it but did not finish it |
Use the leftover milk within 2 hours after feeding ends, then discard it. |
Start the timer based on the bottle’s state, not the warmer’s settings. A keep-warm function or a convenient saved cycle does not extend the 2-hour window.

If a baby refuses a warmed, untouched bottle, note when warming finished. If feeding begins, switch your attention to the leftover-milk rule: the clock for remaining milk is measured from the end of the feeding.
Prepared formula: follow the earlier clock
Formula needs its own timer system. Do not borrow breast-milk storage or leftover rules for formula.
Formula state |
Time limit |
Prepared and kept at room temperature before feeding begins |
Use within 2 hours of preparation. |
Refrigerated immediately after preparation (has not been warmed) |
Use within 24 hours. Once brought to room temperature or warmed, use within 2 hours. |
Baby has started feeding from the bottle |
Use within 1 hour after feeding begins, then discard any leftover formula. |
Once baby drinks from the bottle, do not refrigerate the leftover formula for a later feeding.
Formula does not need to be warmed before feeding, and a wrist check is still important if you choose to warm it. The CDC’s formula preparation and storage guidance sets out the 2-hour room-temperature, 24-hour refrigerated, and 1-hour after-feeding limits.
Make the routine easy to follow at 3 a.m.
Keep the system simple enough that another caregiver can follow it without guessing:
- Label every bottle with contents and the relevant time.
- Keep separate phone timers or written columns for breast milk and formula.
- Verify the warmer manual before saving or repeating a cycle.
- Swirl warmed breast milk; check either liquid on your wrist before feeding.
- After feeding, clean the bottle and feeding parts.
- Let the handling clock—not the warmer’s display or convenience mode—decide whether a bottle can still be used.
A well-organized combo-feeding routine does not require two appliances or a perfect preset. It requires two clearly labeled workflows, a verified warmer setup, and a consistent habit of checking temperature and timing before every feed.








