MEDICALLY REVIEWED BY

Shelly Umstot, BSN, RN
Shelly Umstot is a BSN and has been a registered nurse for over 35 years. She lives in North East Ohio and is a freelance health content writer. Her passion is bringing understanding to those with questions and concerns regarding health issues and helping them obtain and maintain their optimal health. She loves being with her family and has two lovely granddaughters who have stolen her heart. Assisting new parents in finding the information they need to face the joys and challenges of caring for their children is a gratifying experience for her as a professional, parent, and grandparent herself.
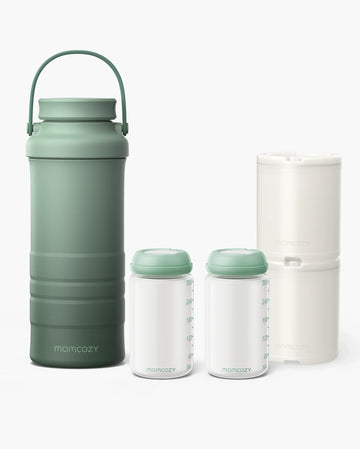
For many pumping parents, a well-packed insulated cooler bag with fully frozen ice packs is enough. Current guidance allows expressed breast milk to travel in an insulated cooler with frozen ice packs for up to 24 hours. A powered portable chiller becomes worth its extra weight, charging needs, and cost when your actual route makes that frozen-pack condition difficult to maintain—for example, a long, hot, multi-stop day with no dependable refrigerator or replacement ice.
The key is not whether a chiller sounds more advanced. It is whether it solves a real weak point in your milk-transport plan.
Start with the Route, Not the Device
An insulated cooler bag is a passive system: it relies on its insulation and frozen ice packs. A portable chiller is an active system: it relies on power and must be managed as part of your travel setup.
That distinction matters because the published 24-hour breast milk storage basics apply to an insulated cooler with frozen ice packs. It does not mean every cooler bag will stay cold for 24 hours regardless of packing, outdoor conditions, repeated opening, or melted packs.

A cooler bag is usually the lower-burden choice when your route is predictable:
- You can begin with fully frozen ice packs.
- The milk is already chilled or can be cooled before packing.
- The bag will stay closed for most of the trip.
- You have a reliable refrigerator or freezer at the destination.
- You can transfer the milk promptly when you arrive.
- A delay would still leave you within the storage guidance's conditions.
This often describes a commute home after work, a daycare handoff, a direct drive after an appointment, or a travel day that ends at a confirmed refrigerator.
Freshly expressed milk can stay at room temperature for up to 4 hours only when the room is 77°F or colder. That is not a useful shortcut for milk left in a warm car, carried outdoors on a hot day, or held in conditions you cannot confidently assess.
When Active Cooling is Worth Carrying
A portable chiller is not automatically a safety upgrade. It adds another system to manage: the unit itself, its power source, charging or vehicle cable, bottles or milk containers, and a backup plan in case of power interruption.
It may earn that burden when several complications stack up at once:
- Extended heat exposure: You expect to be outdoors for long periods, in transit, or between air-conditioned stops.
- Multiple travel legs: Pumping, driving, waiting, transfers, meetings, pickup, and overnight lodging all create opportunities for delay.
- Frequent access: You need to open the container repeatedly to pump supplies, bottles, or milk.
- No dependable ice replacement: You cannot count on a freezer, fresh ice packs, or a refrigerator during the day.
- An uncertain finish time: A delayed return home would make a passive setup feel too close to its limit.
- A need for more control: Your work or travel routine is variable enough that a fixed ice-pack plan is hard to repeat confidently.
Here is the practical trade-off:
Consideration |
Insulated Cooler Bag With Frozen Packs |
Portable Chiller |
|---|---|---|
Cooling approach |
Insulation plus frozen ice packs |
Powered cooling system |
Daily burden |
Bag, milk containers, and ice packs |
Unit, milk containers, power source or cable, and backup plan |
Best fit |
Predictable routes with reliable refrigeration |
Long, hot, multi-stop, or disruption-prone routes |
Main planning question |
Will the packs remain frozen for the whole route? |
Can the unit’s documented performance and power plan cover the whole route? |
Failure point |
Melted packs or prolonged exposure |
Lost power, depleted battery, cable problem, or unverified operating conditions |
Do not assume that a powered unit will maintain a specific temperature, run for a specific number of hours, operate in a hot parked car, or comply with airline battery rules. Those are model-specific questions. Before relying on active cooling, verify the manufacturer’s current documentation for the exact model, power configuration, capacity, operating limits, and the runtime conditions you intend to use.
A display on a chiller can be convenient, but it is not a substitute for an independent thermometer to verify the temperature inside the storage compartment.
Build a Plan Around the Whole Packed Load
The lighter option is not always the bag with the lower empty weight. Compare what you will actually carry from door to door.
For a passive setup, include:
- Cooler bag
- Fully frozen ice packs
- Milk containers
- Pump parts and cleaning supplies
- A backup frozen pack if your route allows it
For an active setup, include:
- Chiller unit
- Milk containers
- Battery, cable, or car adapter as applicable
- Charging plan
- Backup cooling option for a power interruption
- Any extra bag needed to carry the system
A chiller can be sensible when it replaces a large, awkward collection of ice packs and uncertainty. It is less compelling when it simply duplicates a passive system that already fits a short, controlled commute.
Pack for the Conditions You Can Verify
Whichever option you choose, make the plan as simple and observable as possible. These are practical workflow steps, not guarantees of a particular safe duration:
- Map every leg of the trip. Include pump sessions, car rides, work storage, daycare pickup, stops, and the destination refrigerator or freezer.
- Start with cold supplies. For a passive setup, use fully frozen ice packs rather than assuming partially thawed packs will perform the same way. If combining freshly pumped milk with already chilled milk, cool the fresh milk first before adding.
- Limit openings. Decide what needs to be accessible before you leave so you are not repeatedly opening the milk compartment.
- Label milk clearly. Date expressed milk and separate it from other items in the bag.
- Plan the destination step. After travel in an insulated cooler with frozen packs, use the milk right away, refrigerate it, or freeze it at the destination.
- Keep a backup plan. That may mean access to replacement frozen packs, a confirmed refrigerator, or a different route home if a delay develops.
- Treat uncertainty as a planning problem. If packs have melted or a powered device loses power, do not assume the original transport window still applies. Review current storage guidance and seek individualized clinical advice when needed.
If you are transporting previously frozen milk, remember that thawed milk should not be refrozen. Once thawed milk has been brought to room temperature or warmed, it should be used within 2 hours.
Flying Changes the Carry-on Plan, Not the Cooling Decision
For U.S. security screening, breast milk in quantities greater than 3.4 ounces or 100 milliliters is allowed in carry-on baggage and does not need to fit in a quart-sized bag. Frozen ice packs, freezer packs, frozen gel packs, and other cooling accessories for breast milk are also allowed in carry-on bags, even when breast milk is not present.
Tell the TSA officer at the beginning of screening that you are carrying breast milk and remove it for separate screening. Partially frozen or slushy cooling items may receive additional liquid-screening procedures. Clear bottles may help make screening easier, though they are not required.
Those are U.S. screening rules, not a promise that every airline or destination country will treat battery-powered chillers the same way. Before booking, separately confirm your airline’s baggage rules, your destination’s requirements, and the rules that apply to the specific battery or power arrangement you plan to carry.
Choose the Lightest Setup That Covers Your Real Day
Choose a cooler bag with frozen ice packs when your route is predictable, your packs can remain frozen, and refrigeration is waiting at the end. It is often the sensible default for short-to-moderate commutes, daycare transport, and direct trips home.
Consider active cooling when a long, hot, multi-stop, or delay-prone route makes the passive plan unreliable—and only after confirming that the specific chiller’s documented performance, power needs, total packed weight, and backup plan fit how you actually travel.