


MEDICALLY REVIEWED BY

Una Qian, Registered Nurse, IBCLC
I am a Registered Nurse and International Board Certified Lactation Consultant (IBCLC) based in Beijing, China. With 16 years of experience in obstetrics and gynecology, I currently provide clinical breastfeeding support. Over the past few years, I have obtained the Level II Certification in the French WAFF Perinatal Rehabilitation Method and the BFE Level I Certification in Pelvic Floor Rehabilitation (European Level I), which qualifies me to guide both prenatal and postpartum mothers in appropriate exercise programs and provide evidence-based postpartum rehabilitation.
Sterilizing helps reduce germs, but it cannot fix milk residue trapped in tiny seams, valves, nipple holes, or damp storage spots. The safest routine is simple: clean every part first, let steam or heat reach every surface, then dry everything completely.
Why “Sterilized” Does Not Always Mean “Clean”
A sterilizer works best after visible and invisible milk film has already been scrubbed away. The CDC notes that infant feeding items should be taken apart and cleaned because germs can contaminate breast milk or formula through bottle parts like nipples, rings, caps, valves, and membranes.
Think of sterilizing as the final reset, not the whole routine. If dried formula is sitting inside a nipple tip or under a vent flap, steam may not fully touch the surface underneath.

This matters most for newborns, premature babies, and babies with weakened immune systems. Daily sanitizing is especially recommended for babies under 2 months, premature infants, or those with medical vulnerabilities.
The Bottle Spots Parents Commonly Miss
The biggest missed areas are usually small, flexible, or layered. They look clean at a glance, but milk can dry into a thin film.
Before every sterilizing cycle, check nipple holes by squeezing warm soapy water through the opening. Scrub collar threads around the screw grooves where milk splashes, and fully separate anti-colic valves, including every flap, tube, membrane, and insert. A dedicated bottle and nipple cleaner setup makes it easier to scrub those tiny flaps, threads, and inserts before you ever start a sterilizing cycle. Brush the bottle shoulders below the neck, not just the base, and wash inside caps, travel lids, and sealing discs.
If your bottle has a vent system, do not treat it as one piece. Fully disassemble it so water, soap, and steam can reach the hidden surfaces.
A small nipple or straw brush is worth keeping beside your bottle brush. It turns a frustrating two-minute scrub into a quick, precise pass.
The Better Order: Clean, Sterilize, Dry, Store
The most protective routine is not complicated; it just needs the right order. The CDC recommends cleaning feeding items after each feeding and air-drying them thoroughly before storage to help prevent germs and mold.
- Take apart every bottle piece right after feeding.
- Wash in a dedicated basin or dishwasher-safe basket.
- Scrub small parts with a baby-item brush.
- Sterilize only after all milk residue is gone.
- Air-dry fully before reassembling or storing.
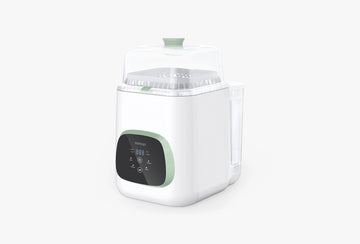
Once parts are residue-free, a Momcozy 4 in 1 Compact Bottle Sterilizer and Dryer can steam-sanitize, dry, and hold items ready so the clean–sterilize–dry–store order stays consistent at home.

Do not rub parts dry with a kitchen towel. Towels can transfer germs back onto clean parts, especially if they have been sitting near the sink.
Storage counts, too. Once dry, reassemble bottles with clean hands and place them in a clean closed cabinet or covered container, away from sink splashes.
When to Be Extra Careful
If your baby is under 2 months old, was born premature, or has a weakened immune system, keep daily sanitizing in the routine unless your pediatrician says otherwise. The FDA emphasizes that infants and young children are more vulnerable because their immune systems are not fully developed.
Also be extra careful after illness, thrush, travel, daycare exposure, or any time a bottle sat unfinished. Formula or milk left after feeding should be discarded because a baby’s saliva can introduce bacteria that multiply quickly.
One nuance: home bottle hygiene research is thinner than parents deserve. A systematic review found that available studies were limited and older, so the strongest everyday advice is still consistent cleaning, careful disassembly, and complete drying.
A Low-Stress Check Before the Next Feed
Before you call a bottle ready, do a 10-second check. Look for cloudy film, smell for sour milk, touch for slickness, and inspect nipples for tears or stickiness.
Replace nipples that are cracked, stretched, discolored, or slow to come clean. Replace bottles with scratches, cloudiness, or damaged threads, because rough surfaces can hold residue.
Sterilizing is helpful, but your best defense is the calm routine around it: take it apart, scrub the hidden places, sterilize with space between parts, and let everything dry completely.








