


MEDICALLY REVIEWED BY

Pada Yang is a registered nurse with more than 12 years of experience in obstetrics‑gynecology and an International Board‑Certified Lactation Consultant (IBCLC). Based in Beijing, she works as a maternal‑health content reviewer and freelance health writer. She is dedicated to making reliable, easy‑to‑understand guidance accessible to families navigating postpartum recovery and breastfeeding, empowering parents to build gentle, confident care for their little ones. Outside of work, she enjoys quiet time with her family. Supporting new parents with evidence‑based, compassionate information has always been deeply rewarding for her, both as a clinical professional and a parent.
Create a two-zone feeding station rather than trying to find room for every accessory beside the high chair. Keep clean, fully dry daily essentials in one measured, protected home near the eating area. Send used, wet, or food-soiled items to a separate washable holding and drying zone until they have been cleaned and dried.
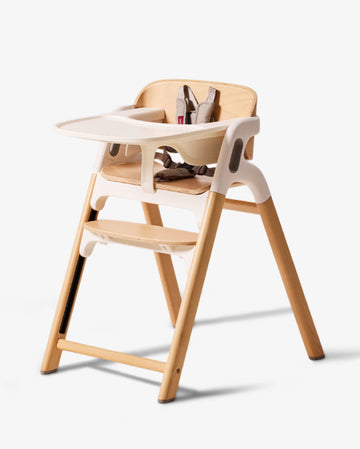
Store the detachable tray off the chair unless your high-chair manual permits it to remain attached. Do not use the chair itself as storage or hang organizers, bags, cords, or accessories from it.
Sort accessories by what happens after a meal
A small apartment works better when each item has a clear next destination. Start by checking your chair’s manual: it is the authority on removable parts, tray attachment, folding, cleaning, drying, and whether any accessory may be stored separately or attached to the chair.

Then divide what you own into three groups.
Group |
What belongs here |
Where it can live |
Daily, clean, and dry |
A small number of bibs, dry utensils, a cup or feeding tool, and the tray if you use it at every meal |
A clean, protected cabinet section, drawer, or covered container near the feeding area |
Backup, clean, and dry |
Extra bibs, backup utensils, spare inserts, replacement parts, and seasonal cushions |
An existing cabinet, linen-storage area, or other dry storage away from the meal zone |
Used, wet, or food-soiled |
Used bibs, damp textiles, dirty utensils, wet tray parts, and items awaiting washing |
A separate washable bin, hamper liner, or designated drying surface—not the clean-storage area |
This distinction matters because a drawer or bin should not become a temporary landing place for everything after a meal. Keep protected storage for items that are already clean and completely dry. For infant feeding items, CDC guidance recommends air-drying thoroughly before storage and placing dry items in a clean, protected area to reduce contamination. See the CDC guidance on cleaning, sanitizing, and storing infant feeding items.
For straps, cushions, inserts, and bibs, follow the material-care instructions for your particular chair or accessory. If a padded component is damp, give it drying time rather than putting it back into an enclosed drawer or bin.
Choose the smallest safe home near the chair
Before buying a cart, bin, hook, or organizer, look for unused storage you already have. A dedicated section of a kitchen cabinet, a shallow drawer, or a protected shelf can be enough for the daily kit.
The goal is not to store every feeding item within arm’s reach. It is to keep the few dry essentials you use repeatedly easy to find without crowding the chair’s path, the kitchen walkway, or appliance doors.
Measure before you commit
Measure both the accessories and the space around them.

- Tray: Measure its widest point, depth, and thickness. Check whether it fits flat, upright, or only in one orientation.
- High chair: Measure the chair’s operating footprint and, if it folds, the folded clearance required by its manual.
- Available gap: Measure width, depth, and height—not just the visible floor gap.
- Access clearance: Leave room to open nearby cabinet doors, drawers, appliance doors, and the organizer itself.
- Walking path: Confirm that a person can pass the chair safely when it is in use.
- Child reach: Consider whether a child could pull on, open, or access the storage.
- Organizer limits: Check the item’s installation instructions, weight limit, and stability when loaded.
A slim organizer can be useful in a narrow kitchen gap, but dimensions matter more than the category. One documented narrow organizer, for example, measures 23.62 inches high, 7.08 inches wide, and 16.14 inches deep. That shows how little width some units use, not that a similar organizer will fit your apartment, hold your tray, or remain stable with your chosen load.
Pick a location by constraint
If you have one free cabinet shelf: Use it for the dry daily kit. A tray may fit vertically only if it is secure, clean, and stored in a way allowed by the chair manufacturer. Keep small feeding tools together in a washable container within the shelf.
If you have a shallow drawer: Reserve it for dry bibs, utensils, and small feeding accessories. Do not use it as a drying drawer.
If there is a narrow floor gap away from the chair’s travel area: A stable freestanding bin or slim organizer may work for dry supplies after you verify fit, drawer clearance, weight limits, and child access. Use enclosed drawers or covered containers for fully dry, clean items rather than leaving food-contact pieces exposed.
If you are considering an over-door, adhesive, magnetic, or hanging option: Treat it as conditional, not automatic. Verify surface compatibility, installation instructions, and weight limits. It must not interfere with a door, create a pull-down risk, block an exit, or place small parts within reach.
Keep the drying zone separate from clean storage
The drying zone does not need to be large. It can be a designated section of counter, a clean unused towel, a paper towel, or a dedicated rack for feeding items. What matters is that it is visibly different from the clean zone.

For infant feeding items, place washed pieces on a clean, unused dish towel or paper towel to air-dry in an area protected from dirt and dust. Avoid rubbing or patting them dry with a dish towel. If you use a drying rack for infant feeding items, reserve it for those items and clean, sanitize, and dry it regularly.
Use the high-chair manual for tray surfaces, harnesses, cushions, and padding. After meals, remove food debris from straps, crevices, and padding as directed for your model. Do not assume that a fabric insert, padded seat, or harness can be washed or dried the same way as a food-contact feeding tool.
A workable small-apartment setup often looks like this:
- Clean zone: cabinet shelf, drawer, or covered container for fully dry daily essentials.
- Drying zone: a protected counter area or dedicated rack.
- Soiled-textile zone: washable hamper, removable liner, or washable bin for used bibs and other soft items awaiting laundering.
The important rule is simple: wet items do not return to the clean zone just because the meal is over.
Keep storage off the high chair
Avoid turning the chair into a storage unit. Do not place items on, underneath, behind, or attach them to the chair unless your specific manufacturer instructions expressly allow it.

That includes bags hanging from the frame, tray holders clipped to the chair, heavy baskets near the legs, and cords or strings within reach. Items on strings should not hang near an occupied high chair because of entanglement risk. The chair also needs to remain stable and free from anything that could affect its position, folding mechanism, restraint system, or safe use.
Before each use, make sure:
- the tray is attached and latched according to the manual;
- the chair’s operating area is clear;
- straps and buckles are accessible and functioning as intended;
- no small loose accessories are within the child’s reach; and
- the chair does not wobble or create a tipping hazard.
If harness straps are torn, frayed, or otherwise damaged, do not keep them in service; follow the manufacturer’s instructions for repair or replacement.
Use a short post-meal reset
The storage plan only works if it takes less effort than leaving everything on the table. Aim for a simple three-to-five-minute reset:
- Remove food debris from the tray, straps, crevices, and padding according to the chair manual.
- Wash removable feeding items and chair components as instructed.
- Put food-contact items on the designated drying surface; leave them there until fully dry.
- Place used bibs and other textiles in the separate washable soiled zone.
- Return only clean, dry essentials to the protected feeding kit.
- Leave the chair area clear for the next meal and for normal movement through the apartment.
A successful small-apartment setup is not a perfectly styled storage corner. It is one measured home for dry daily essentials, one washable place for soiled items, and one reset habit you can repeat after every meal. If you are refining the broader feeding routine, Momcozy’s feeding and caregiving resources can be a useful next place to look—while still keeping your chair manual, measured fit, and cleaning instructions in charge.








